Bismarck House 2016
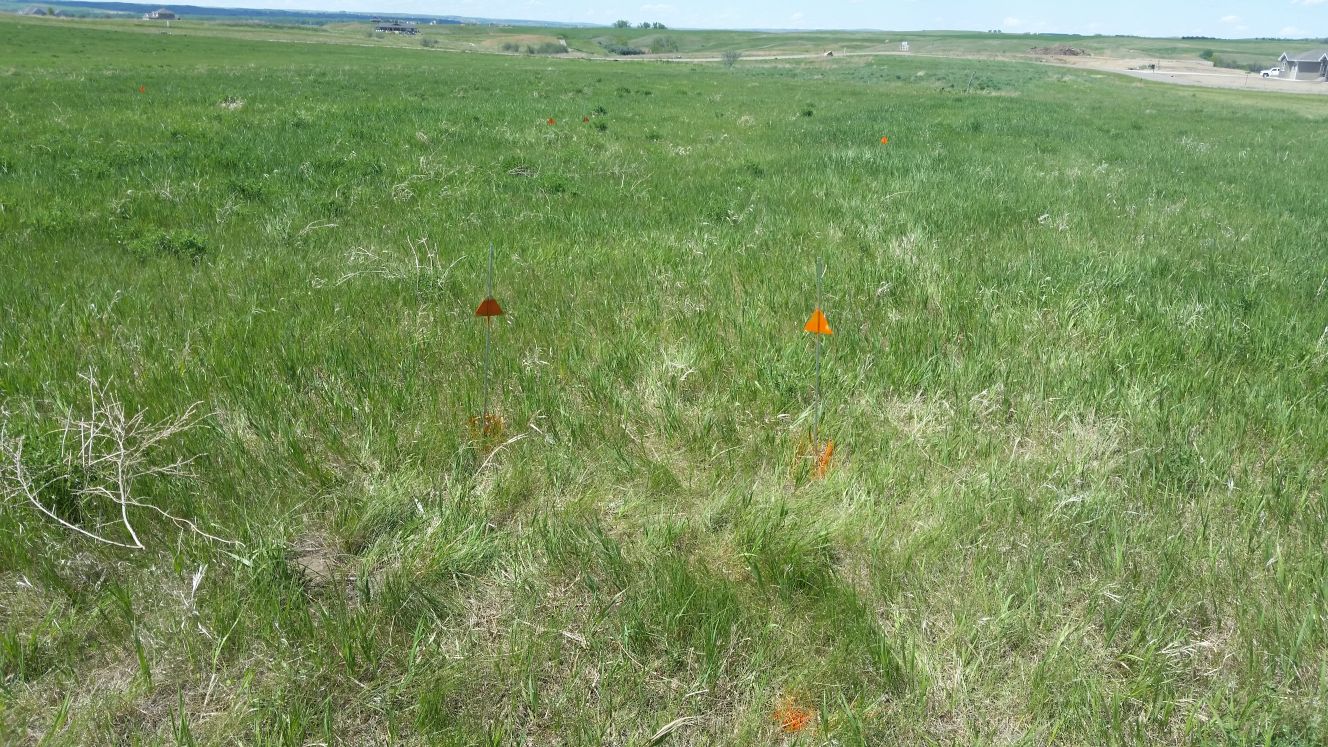
Lot is marked with small fence posts (orange paint) ... shows locations
for house corners.
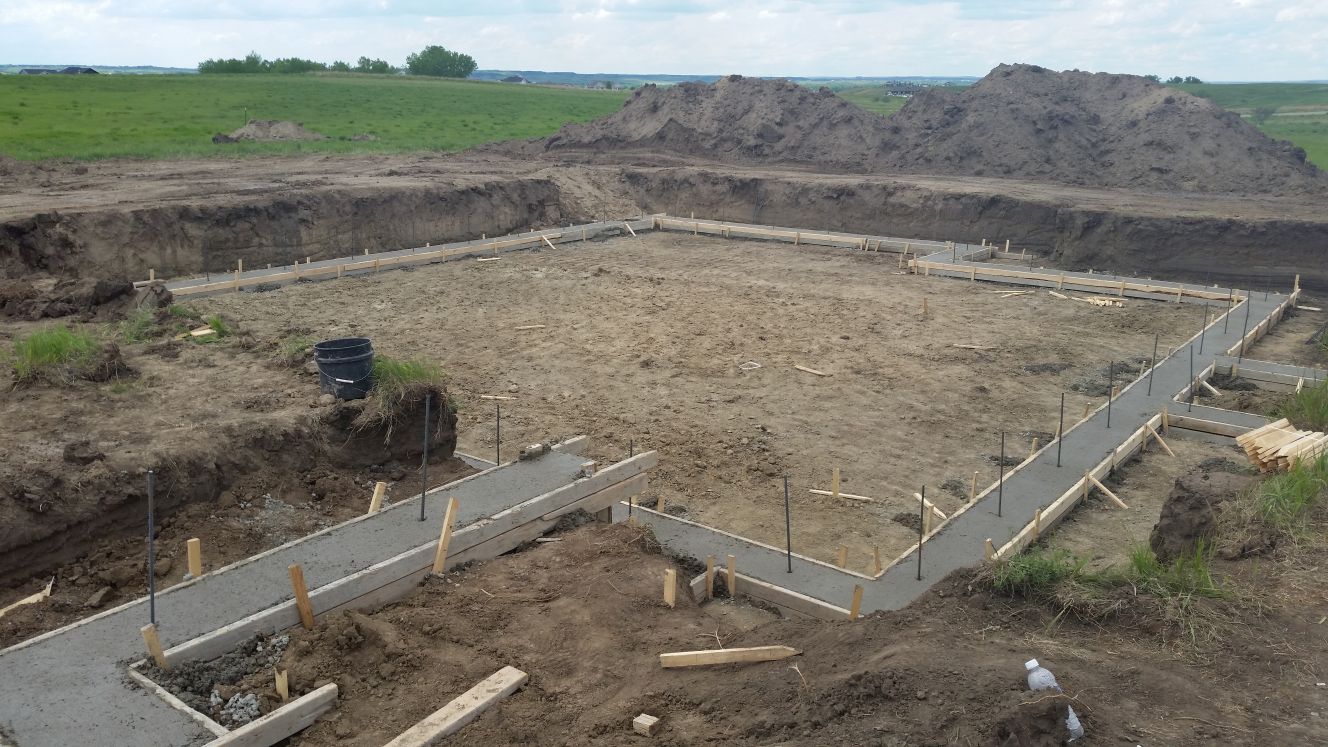
Excavated with concrete footings.
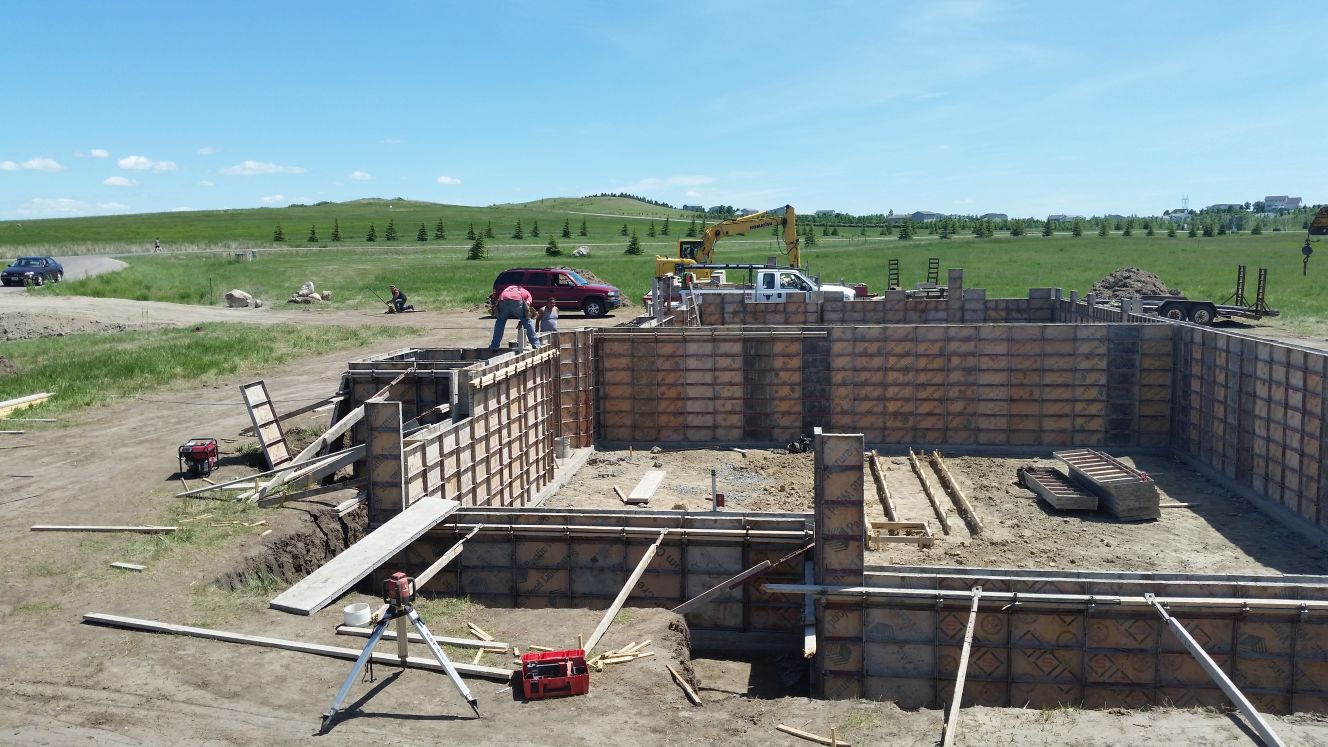
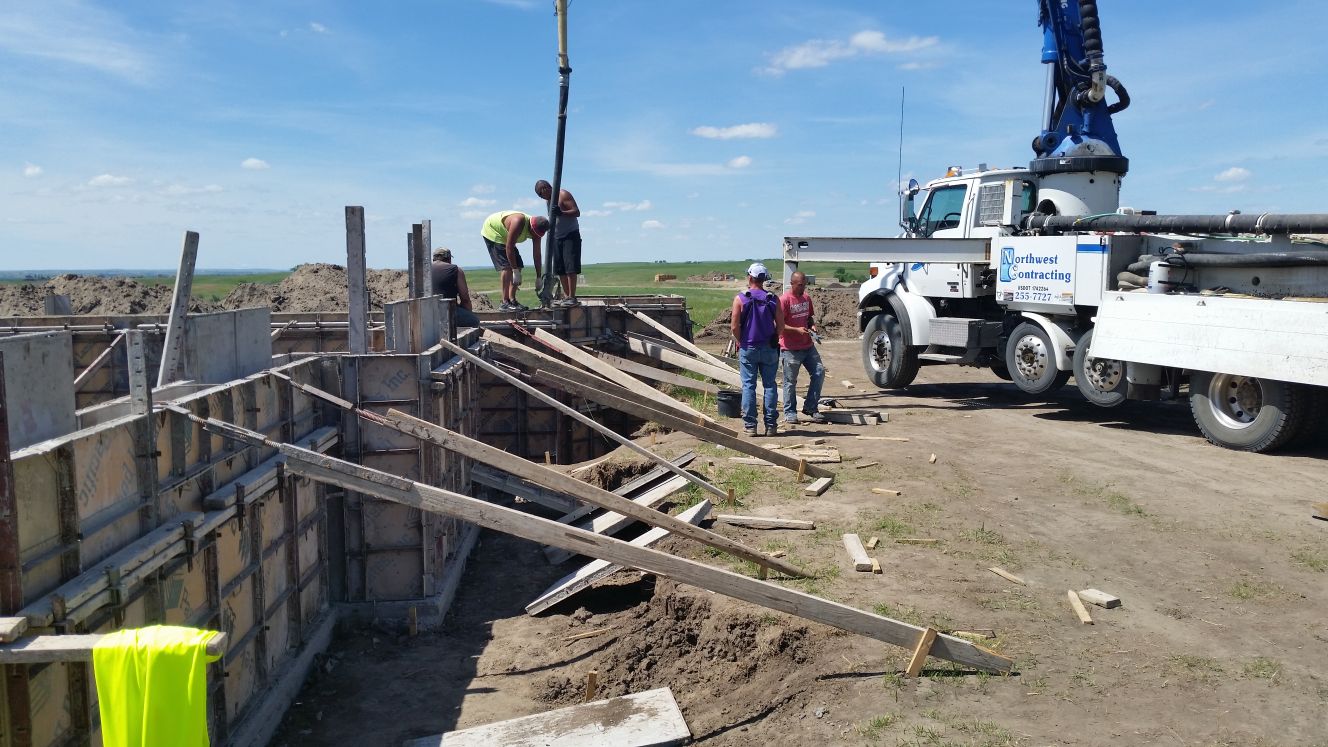
Forms for concrete walls (on top of footings).
Truck that pours concrete through the tube.
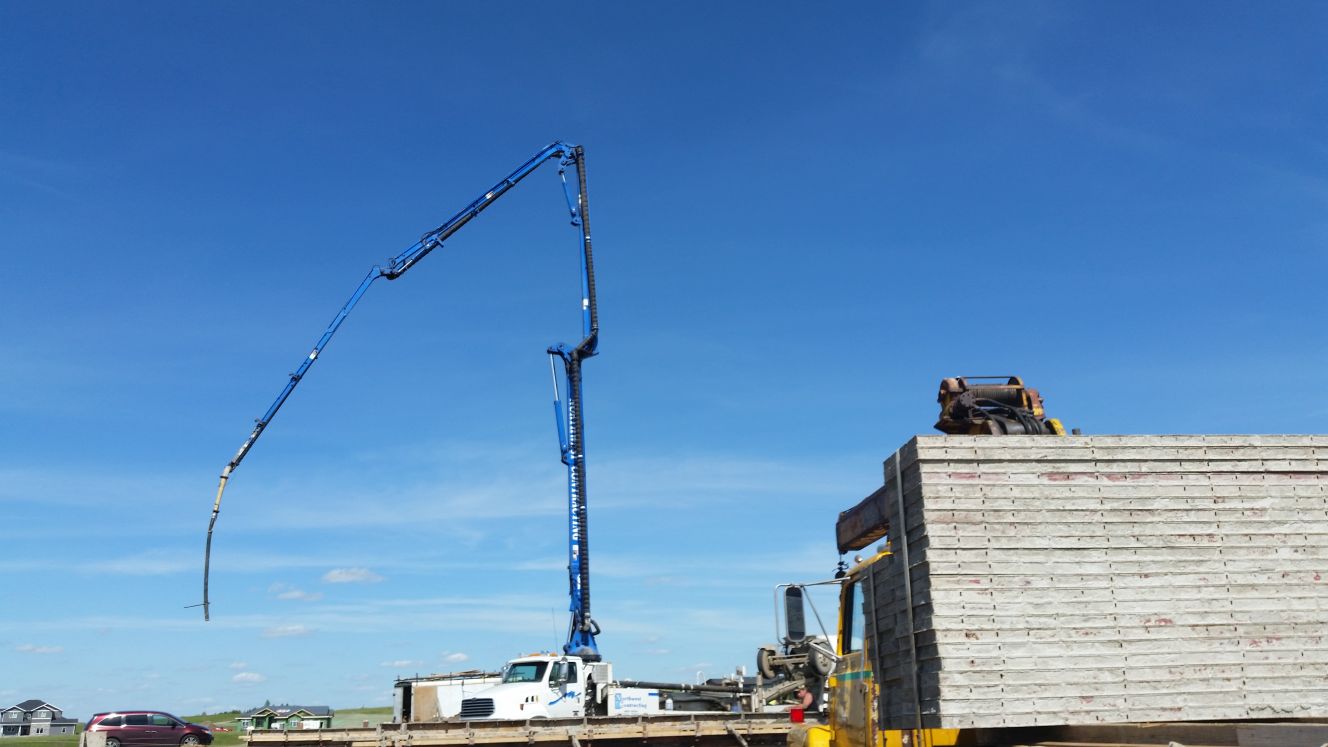
Second truck getting ready to dump concrete into pour truck.
Second truck rotates the concrete continuously from when concrete is put in until
it dumps concrete into the pour truck.
Second truck dumps concrete into pour truck by reversing the rotation.
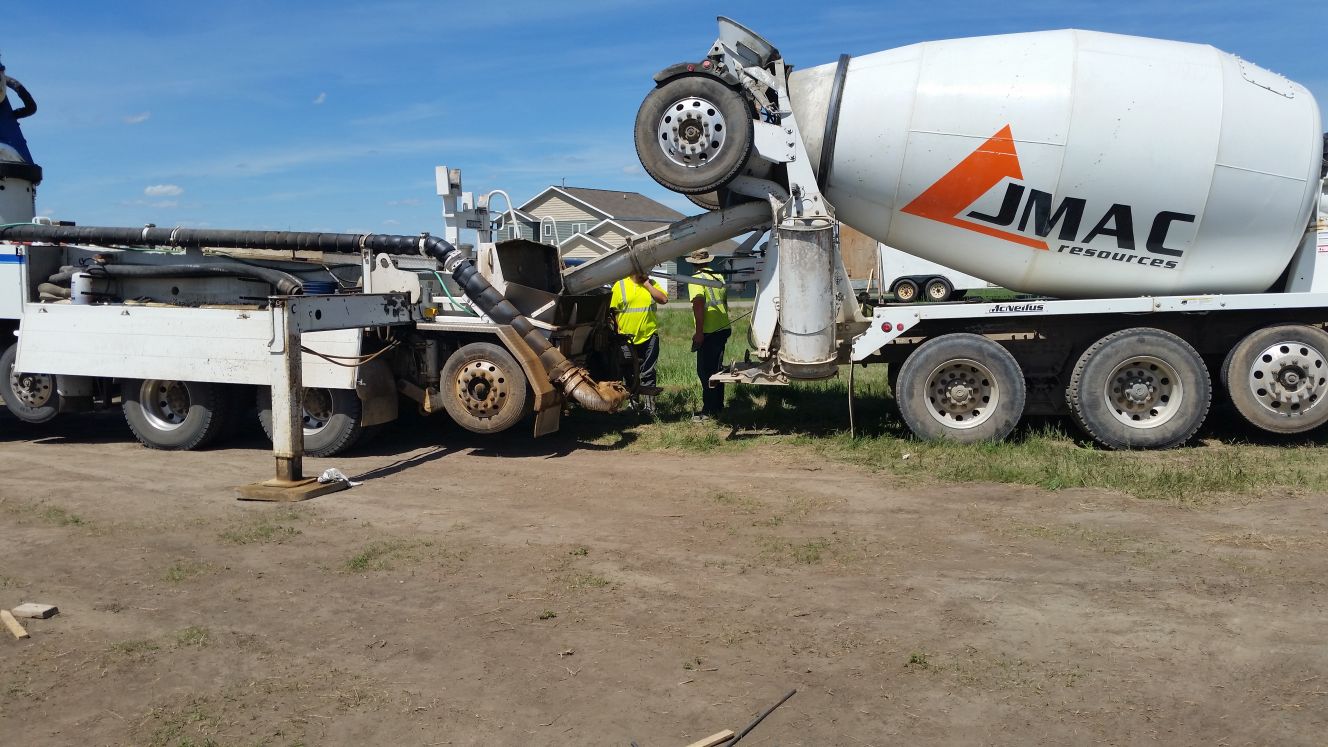
Concrete pour truck pumps concrete through the tube. This tube places the concrete
between the concrete forms for the concrete walls.
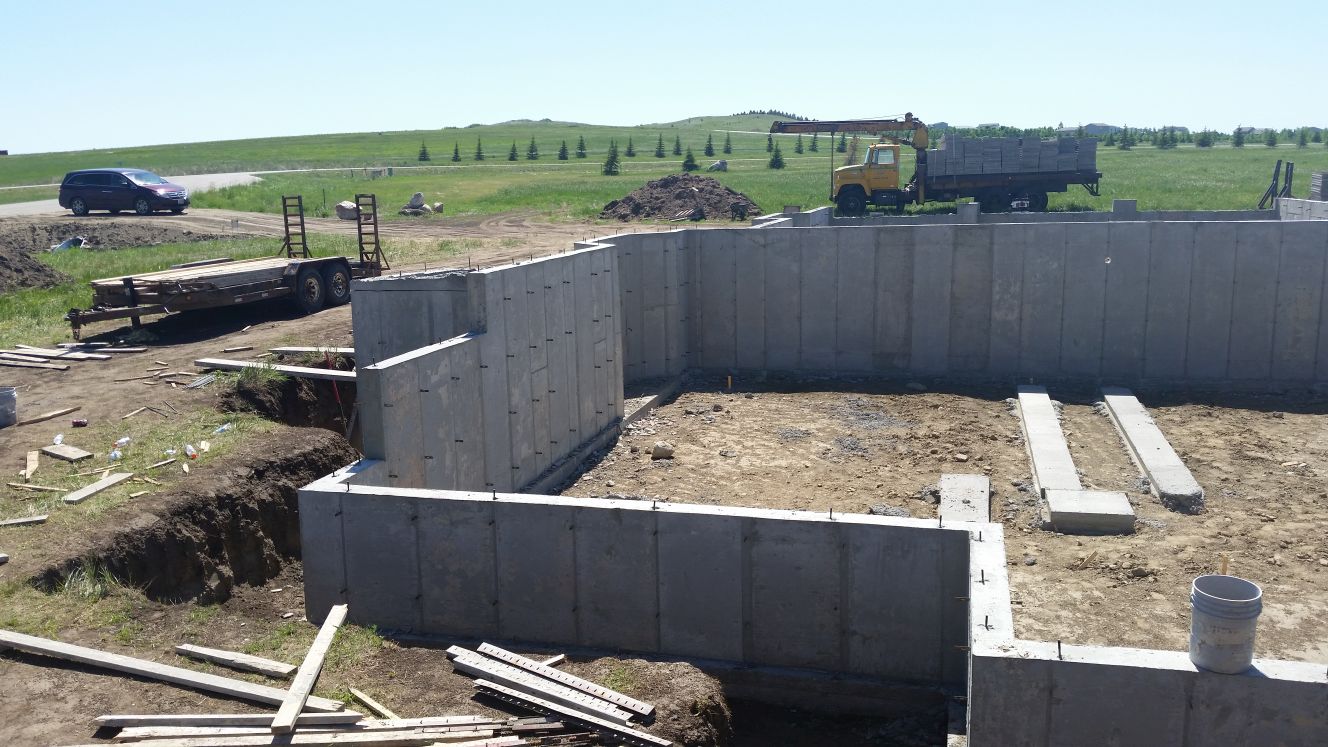
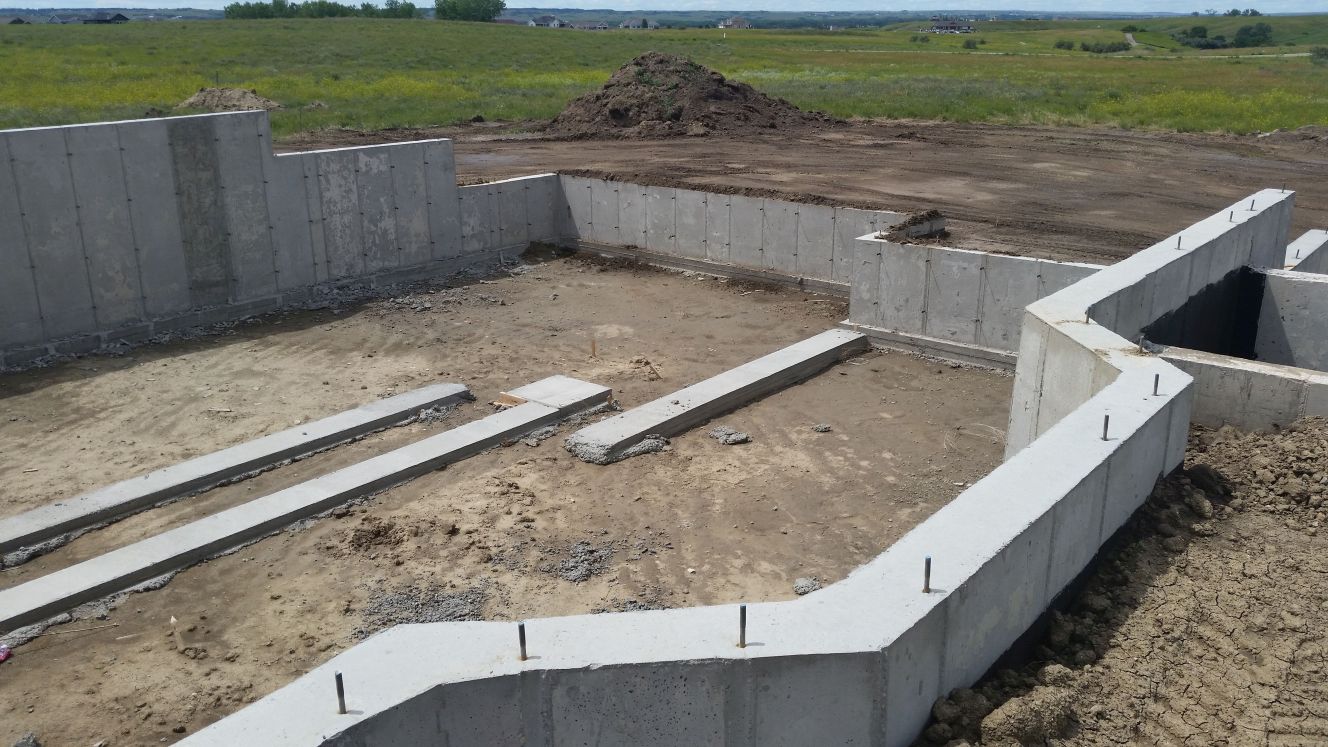
The bottom left is the garage concrete wall / footings ... described later. The
concrete wall is about four feet with about 8 inches of footing beneath the wall.
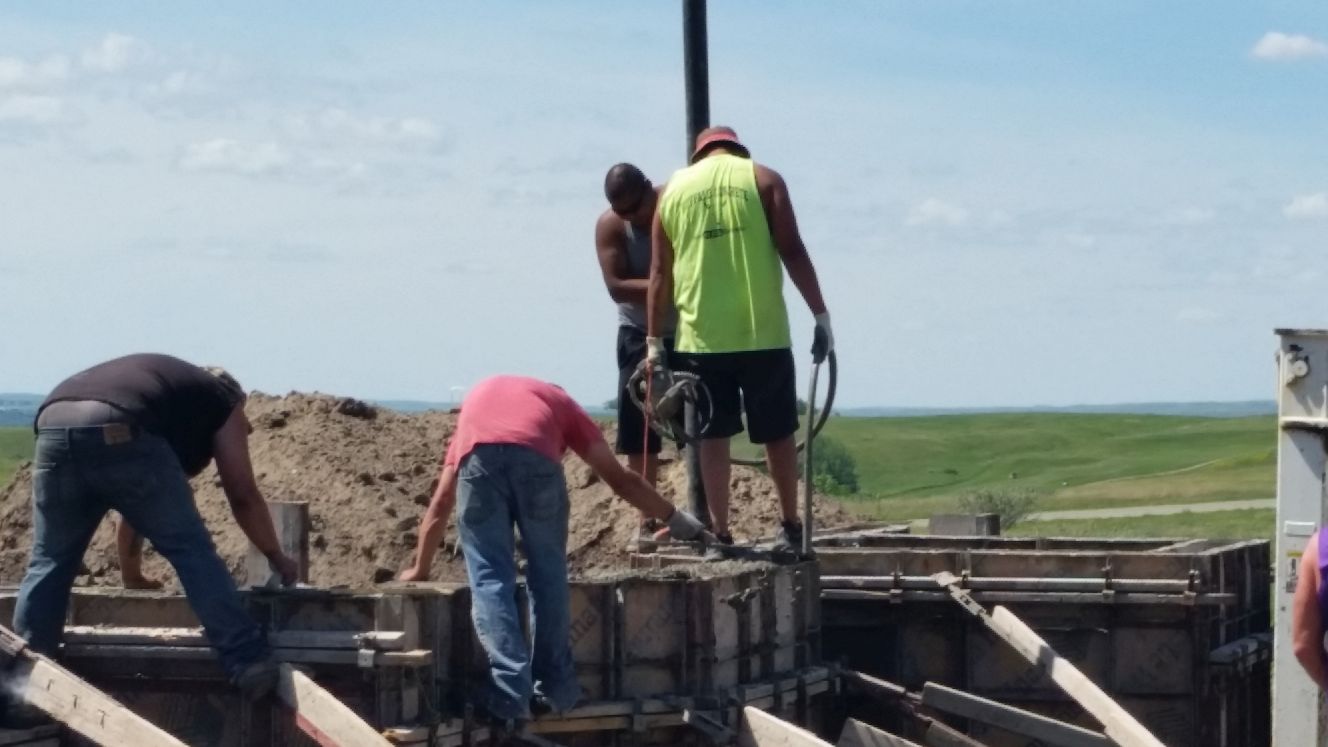
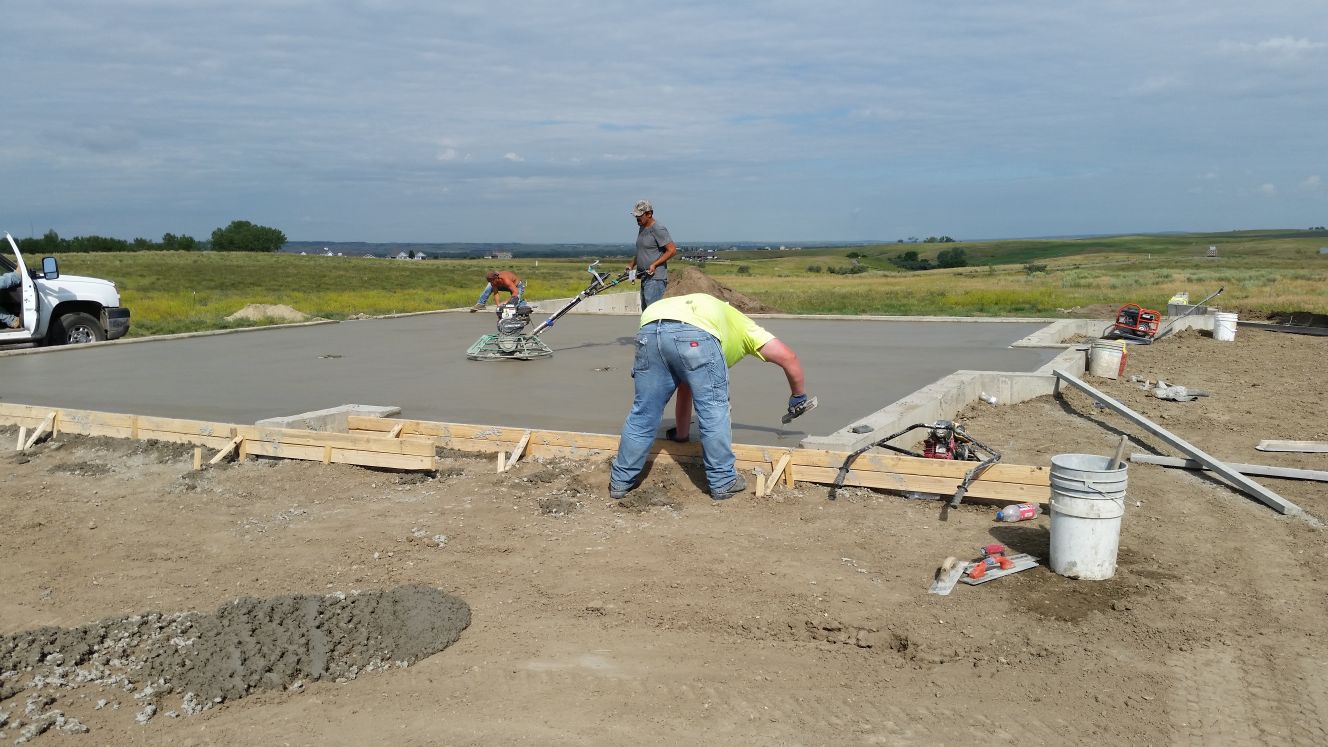
One person vibrates (hand held equipment with hose) the concrete to help it settle
followed by two more people who start to trowel (smooth top) before the concrete
hardens.
Concrete walls a of couple days later. Note the bolts on top of the wall (used
to fasten the wood walls to the concrete walls).
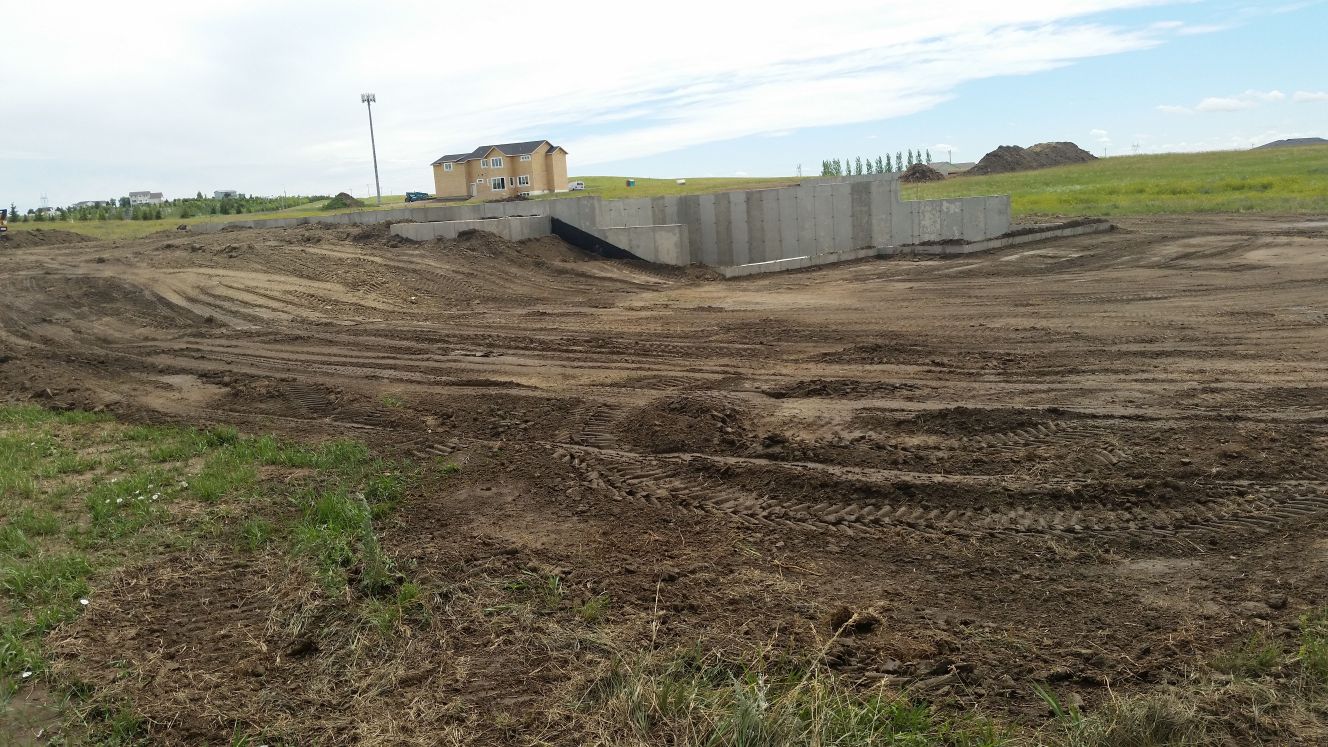
Backfill ... filling the space between the concrete walls and dirt with dirt ...
and starting to put pile dirt around the outside so there is little concrete
visible.
Styrofoam is placed between the concrete and dirt, where the concrete extends
only four feet below the ground surface. This is to provide insulation when, in
the winter, the ground freezes three feet below the surface.
Backfill starting to cover much of concrete and fill empty space between the
concrete wall and the dirt a few feet from the wall.
Garage dirt raised floor about four feet ... dirt close to top of conrete wall.
The garage wood wall will be mounted on top of the conrete. The four feet of
concrete is to protect the wood wall from heaving in the spring.
In the winter, the ground can freeze down to three feet. In the spring, when the
frost melts, the dirt can change elevation ... and can cause the wall height to shift.
By putting the concrete four feet down, the wall height will not change elevation.
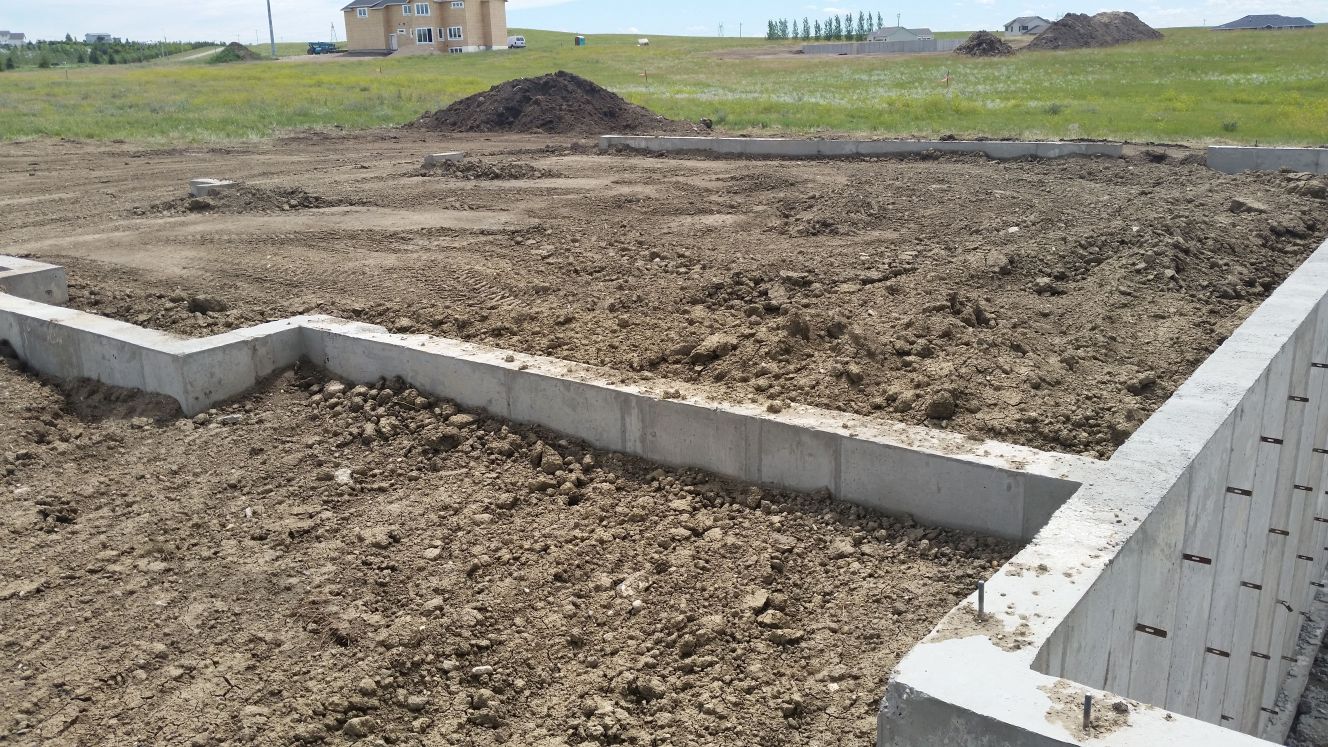
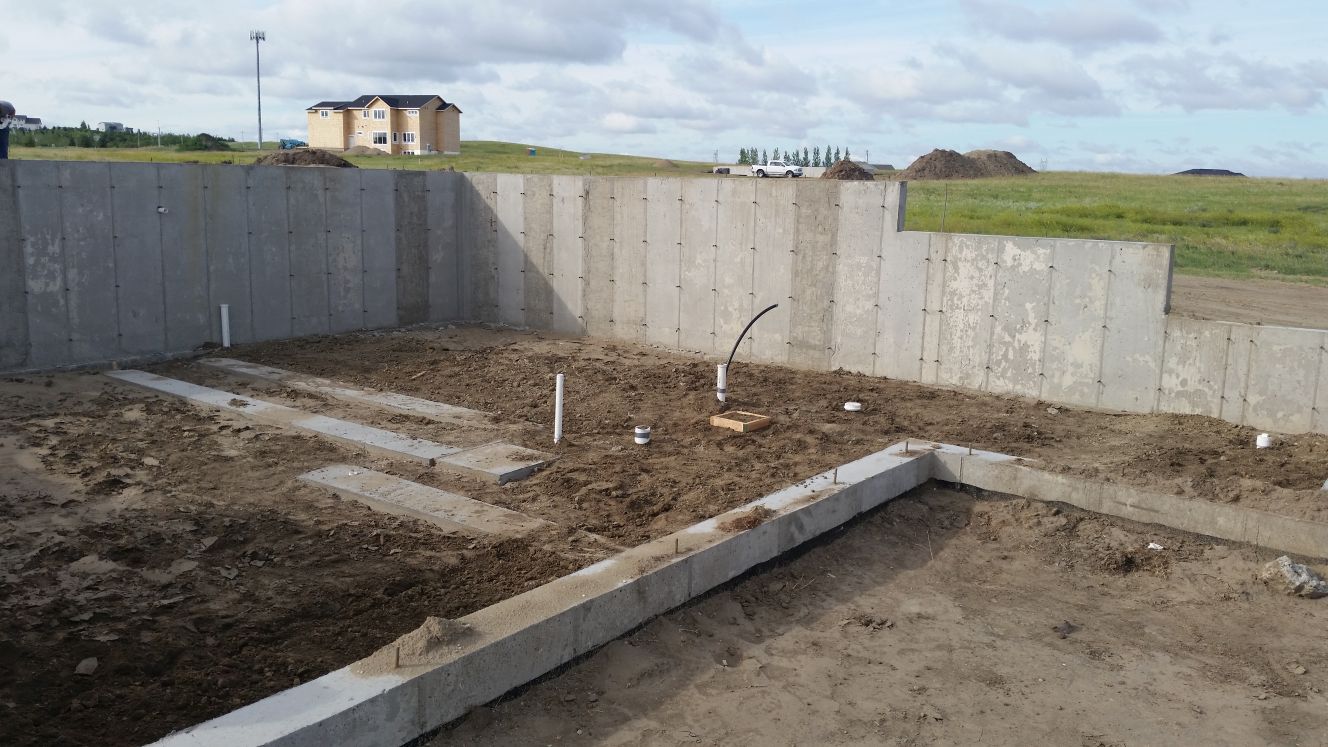
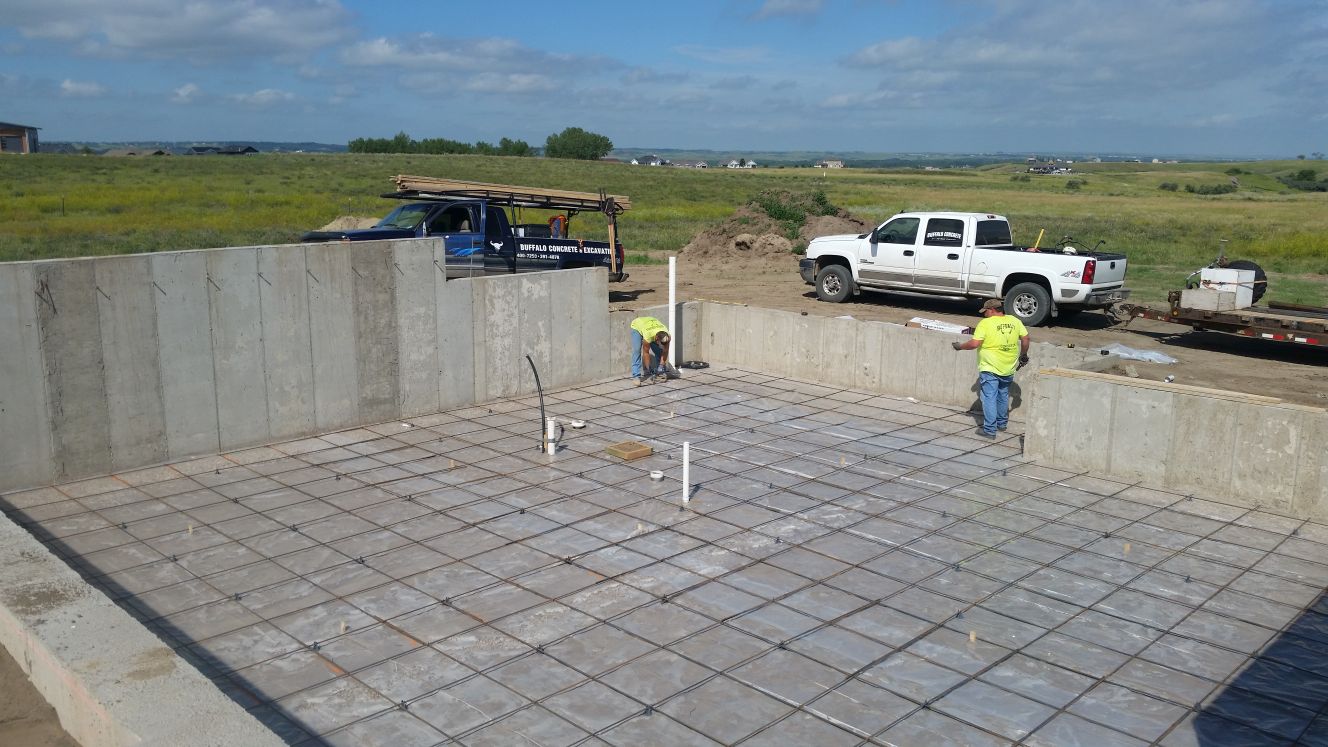
The house basement footings. The parallel footings near the center is for the
basement stairway.
The bolts sticking out of the concrete walls are for attaching the house, so house does
does not move with high winds.
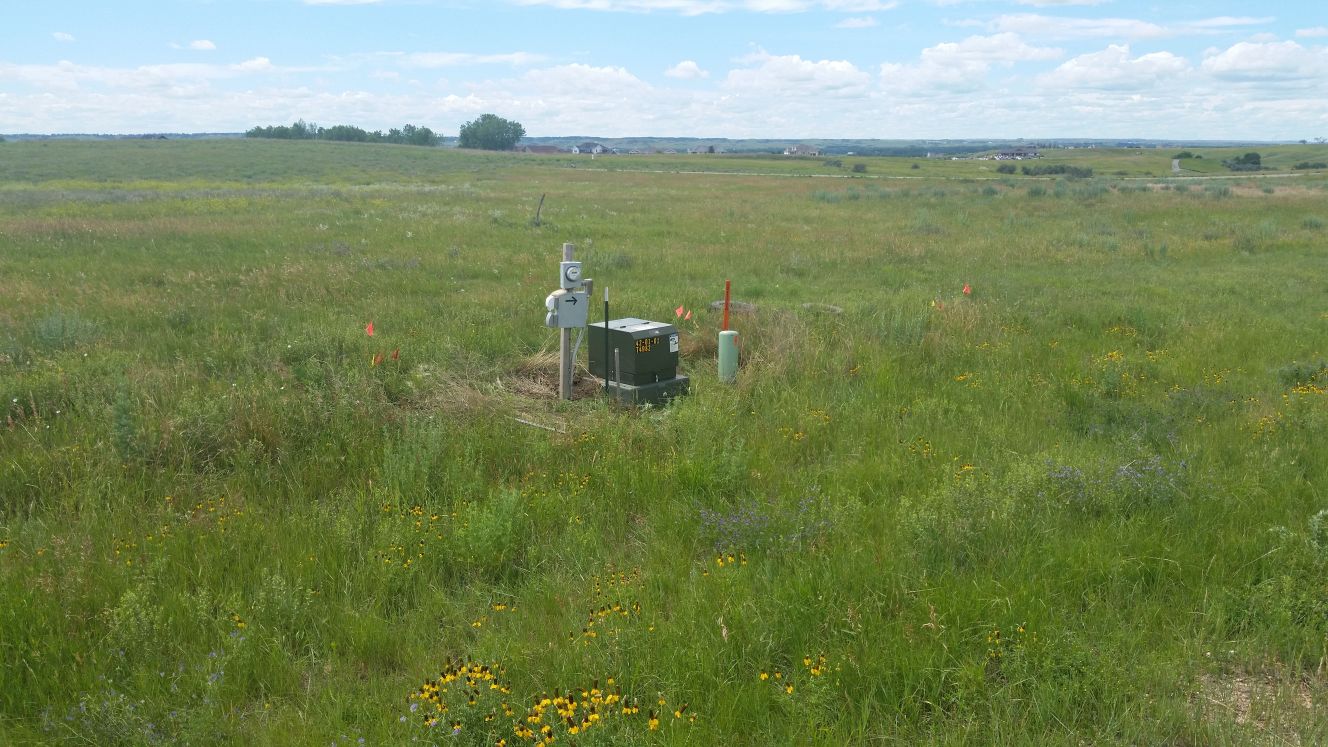
Temporary electrical service ... is needed to provide electricity until the house
is wired for electricity.
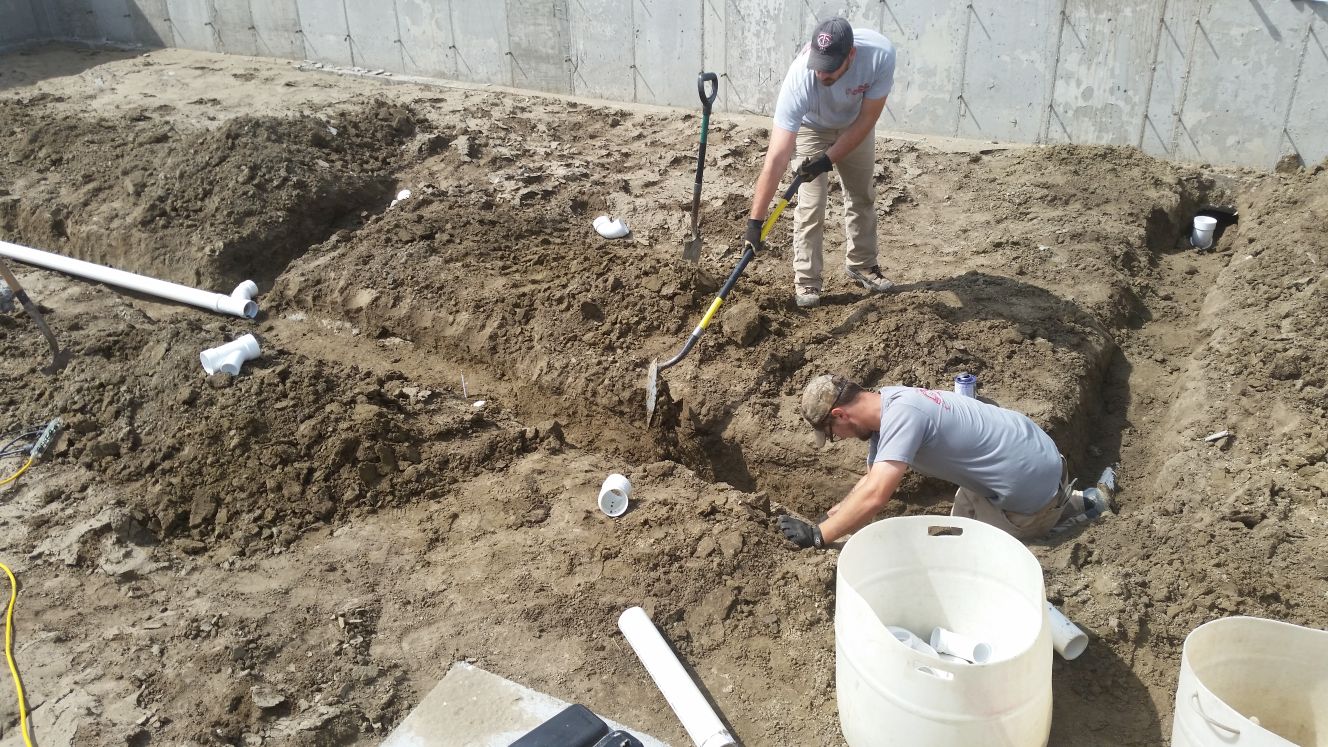
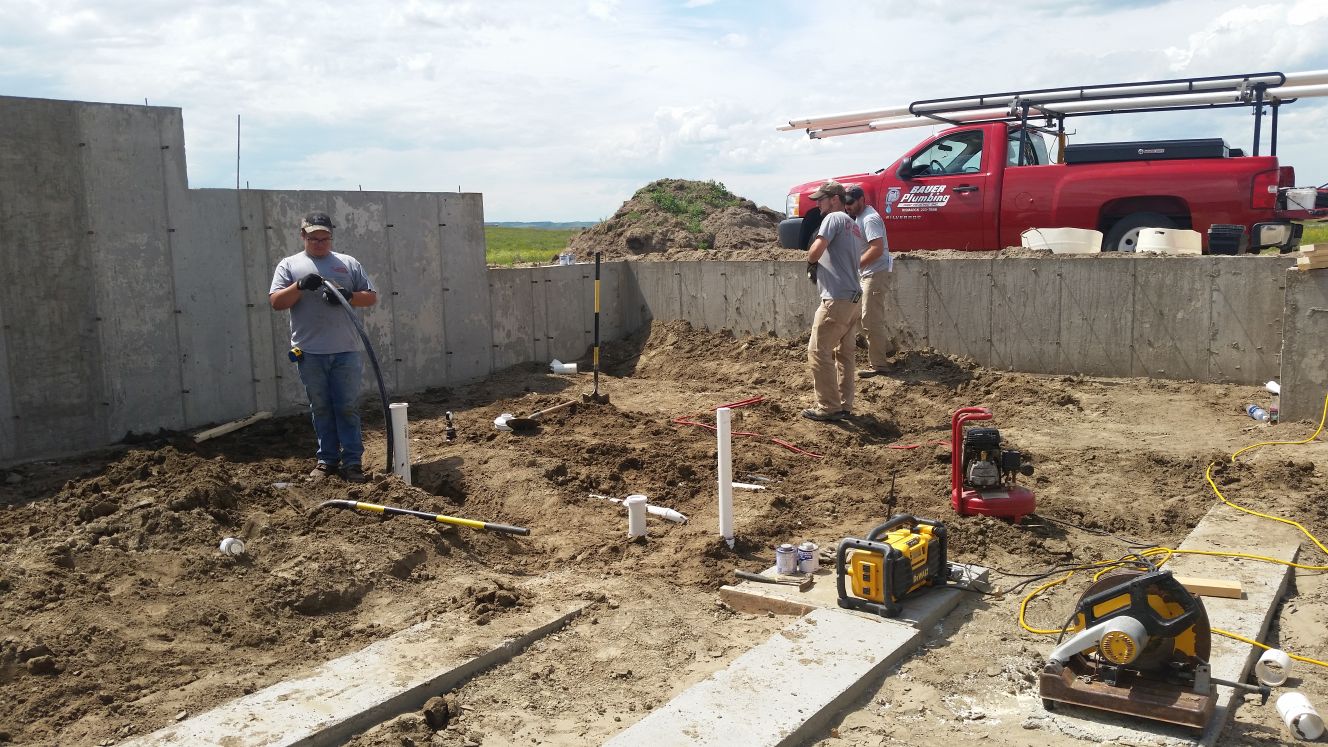
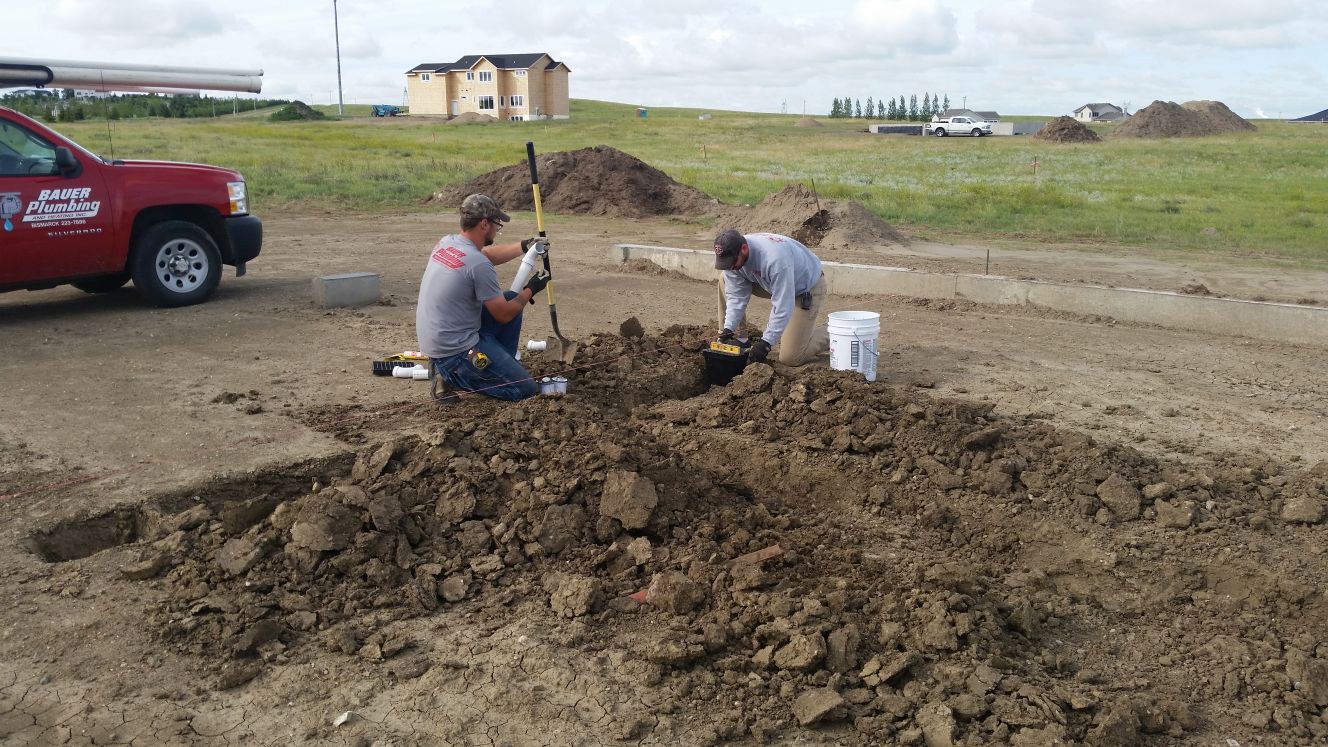
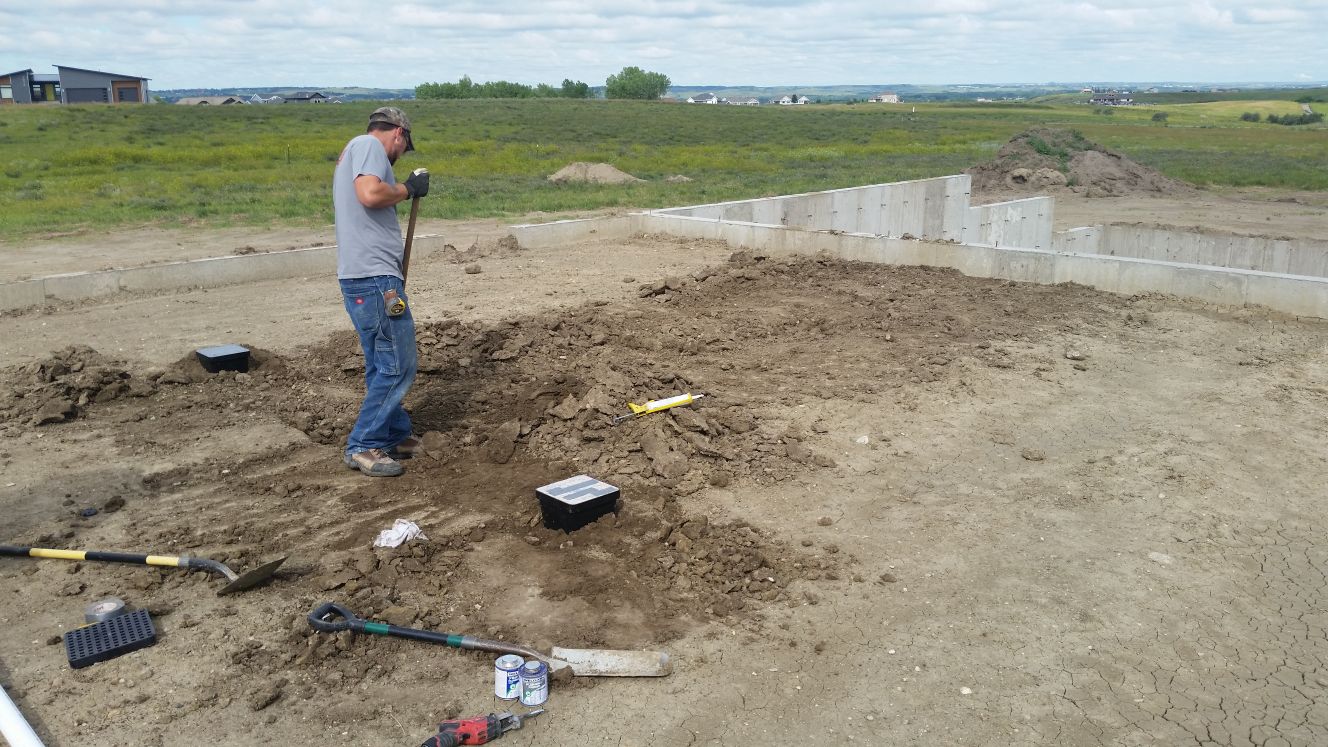
Digging trenches (in the dirt below the basement floor) for the plumbing. All sinks,
showers, toilets connect to these pipes ... which drain to the right top corner ... which
(called a stub) is connected to the septic tank outside the house.
More drain pipe being added. Note the black pipe which will be connected to the fresh
water pipe outside the house.
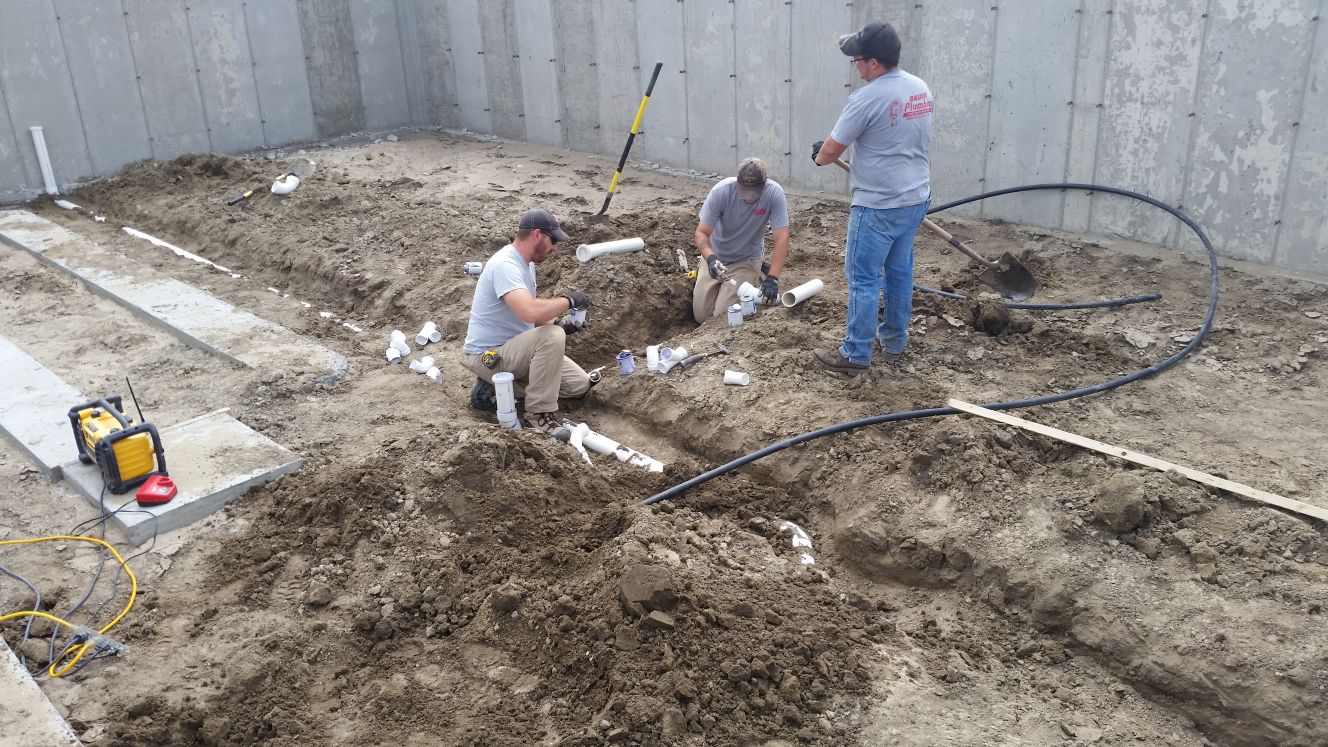
The black pipe is being taped vertically, so it is accessible after the concrete basement
floor is poured.
The vertical white pipes will be extended through the house roof. For the water to flow
smoothly, it needs air behind it.
The yellow / black rectangle is a radio. The yellow / black circular tool (bottom right) is
a saw (used to cut the white pipe). The red tool is used to put pressure in the pipe, to
verify there are no holes / leaks in the pipe.
The plumbing has been covered with dirt ... ready for the concrete floor to be poured.
The right side is near the stub (which will connect to the septic tank), This also has
a lid that can be unscrewed, in case something plugs the drain pipe.
On the left side, high on the wall, is a white pipe which connects to the drains in the
garage.
Installation of the garage floor drains. The drains will be about two inches below the
garage floor. The garage floor will be sloped toward the drains.
The garage floor drains connect to a white pipe (no longer visible) which extends to the
basement wall (along top edge).
The garage floor drains have a temporary protective cover so no concrete goes into the drains
when the concrete garage floor is poured.
Before the concrete basement floor is poured, there is a layer of plastic (for radon
protection) and rebar (long metal rods crisscrossing to make the floor stronger)
Before the concrete garage floor is poured, the ground is smoothed and packed (yellow).
After the concrete is poured, people make it smooth ... and slope the concrete
toward the garage floor drains.
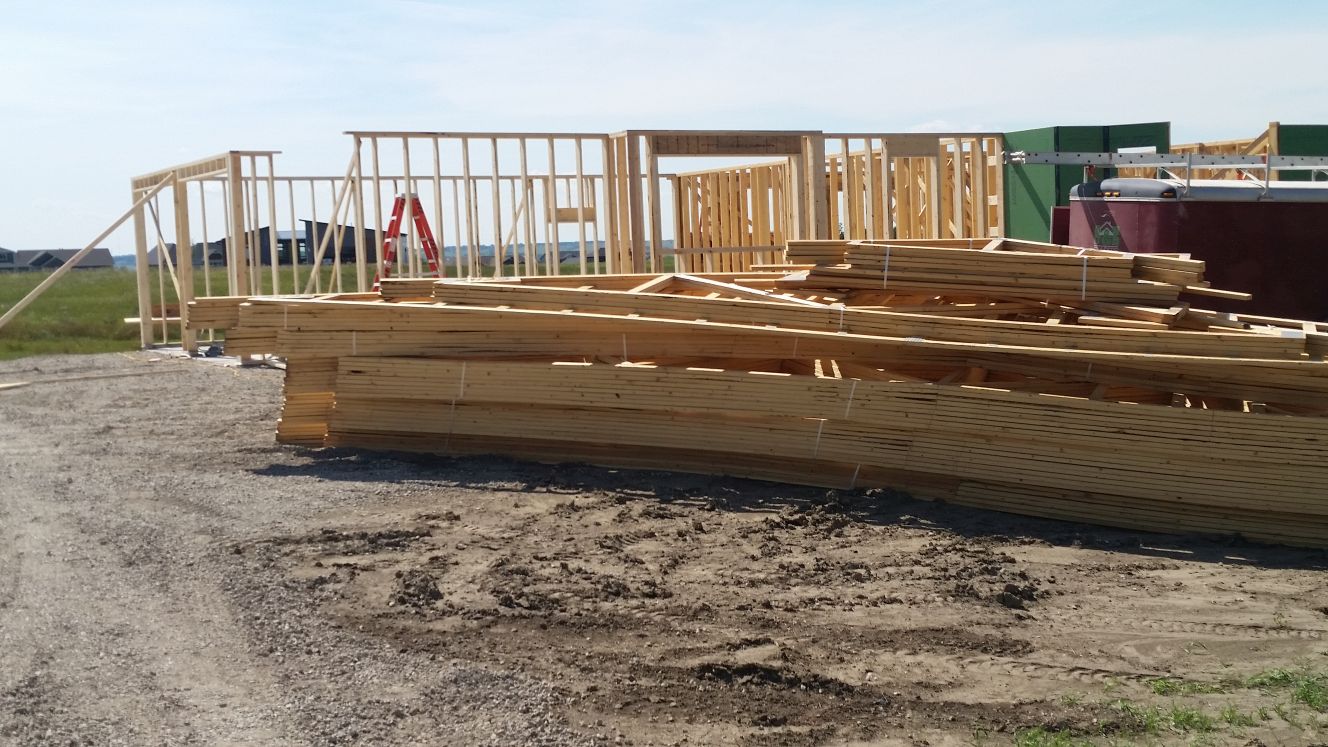
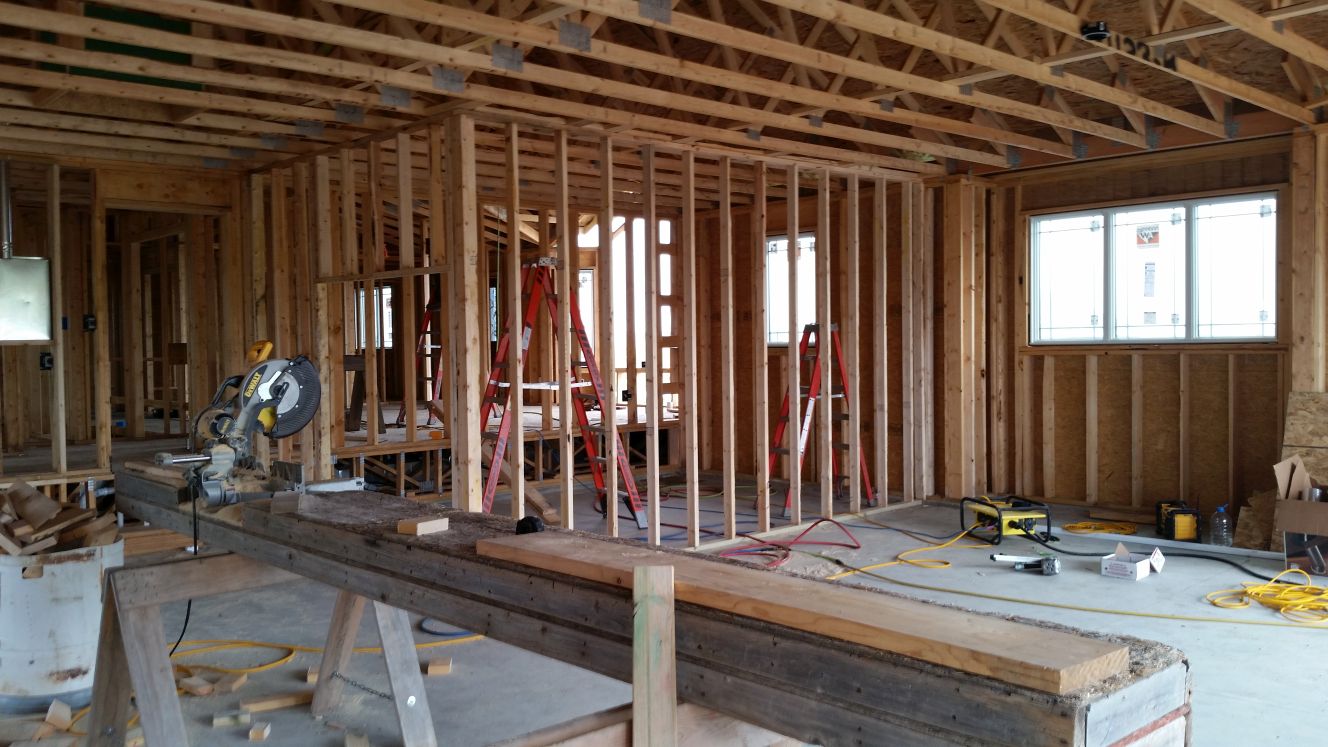
Wood 2x4's are used for the house walls.
Floor trusses are placed on top of the basement walls. These trusses support the house
floor. The trusses are quite strong
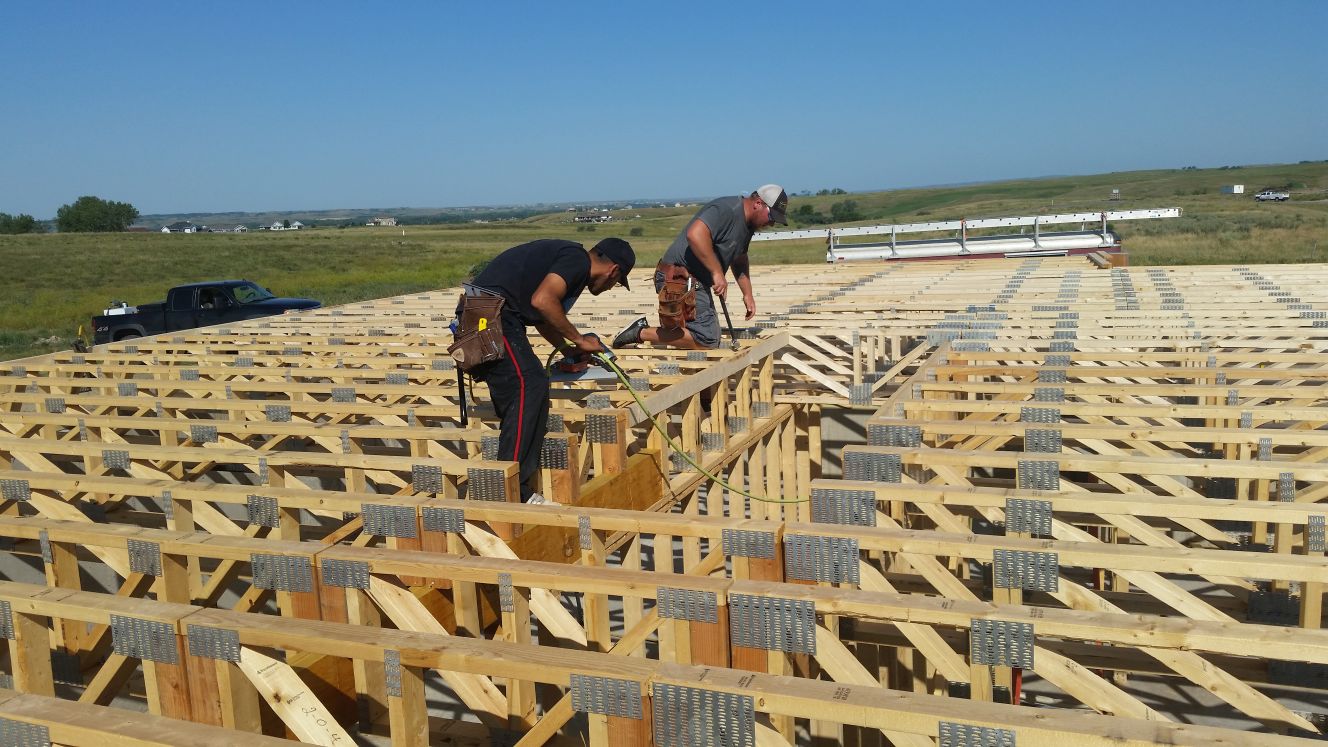
Sheets of plywood are placed on the floor trusses. Wood 2x4's for the main floor
walls are placed on top of the sheets of plywood.
The rectangular hole is for the stairs to the basement.
The 2x4's in the middle of the floor are cut to the correct length before being
fully assembled and raised vertically.
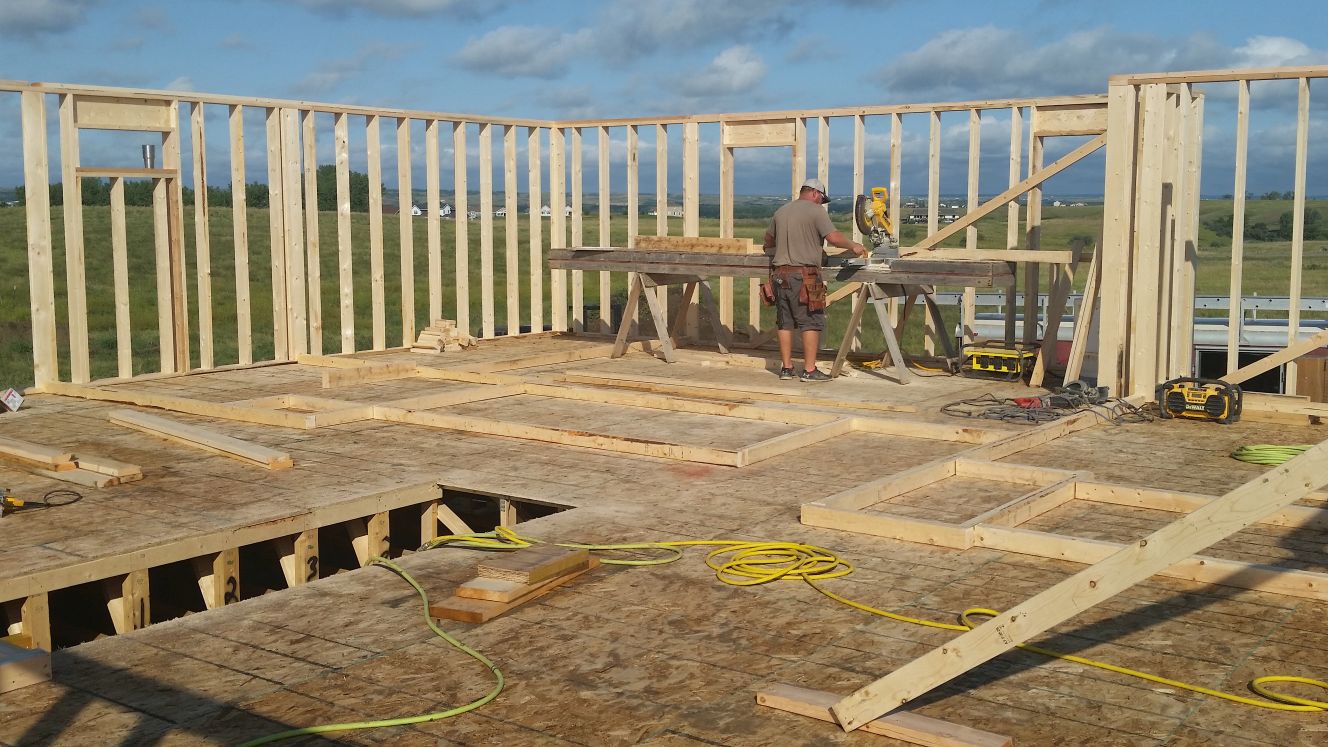
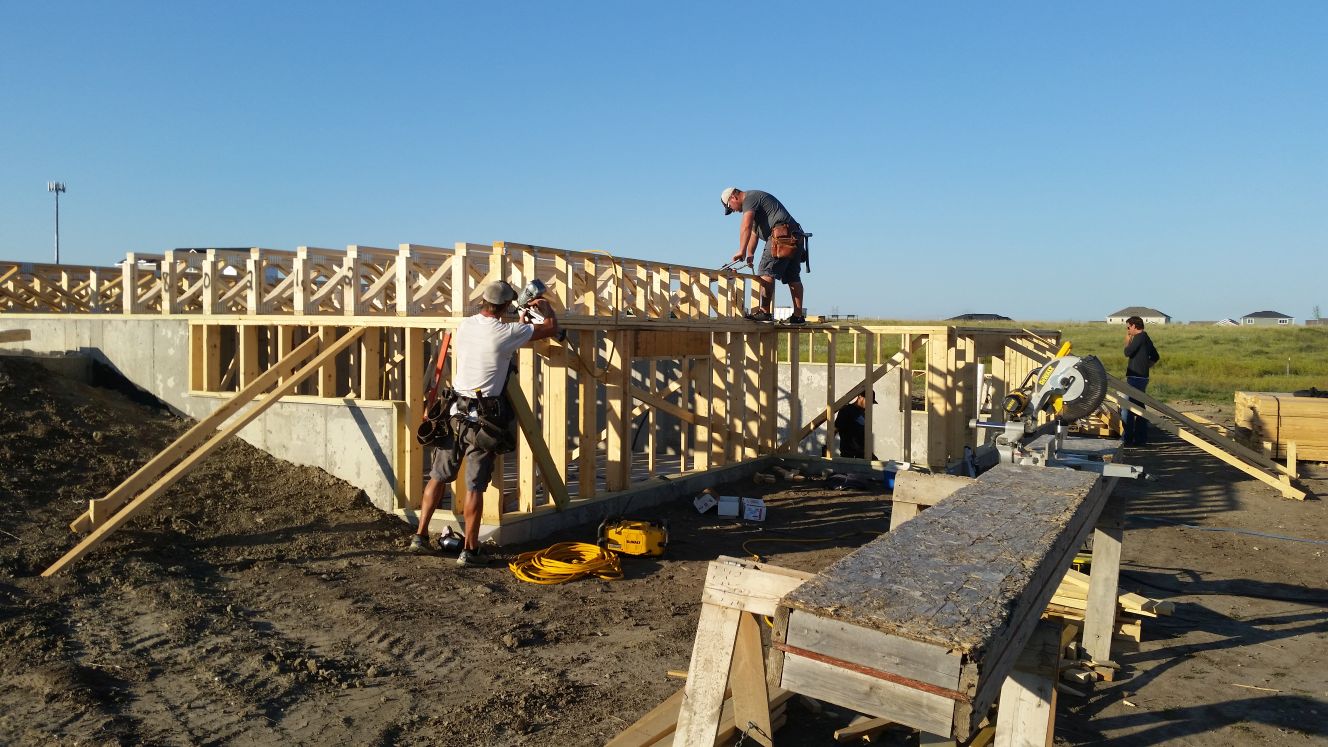
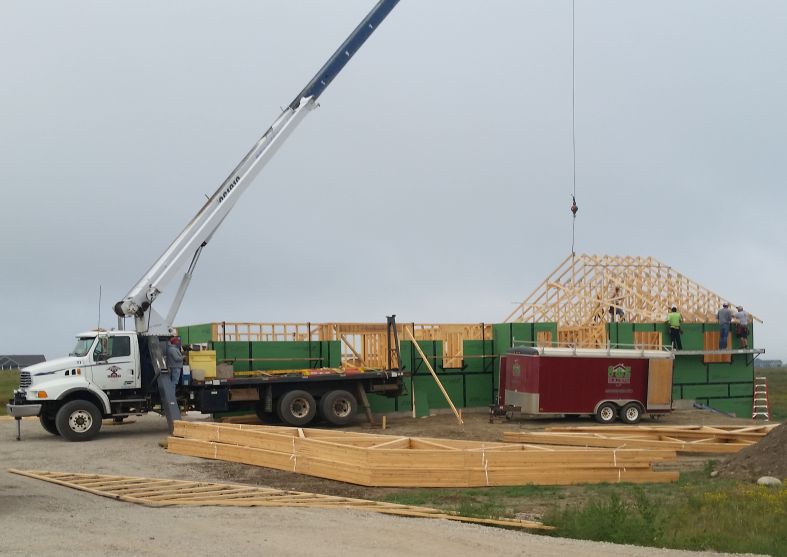
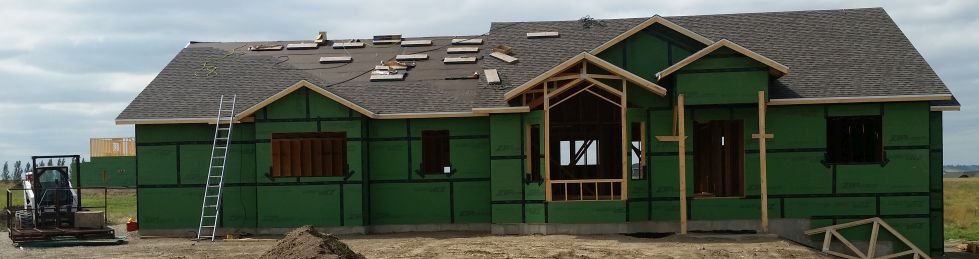
The house walls are placed vertically before the garage walls.
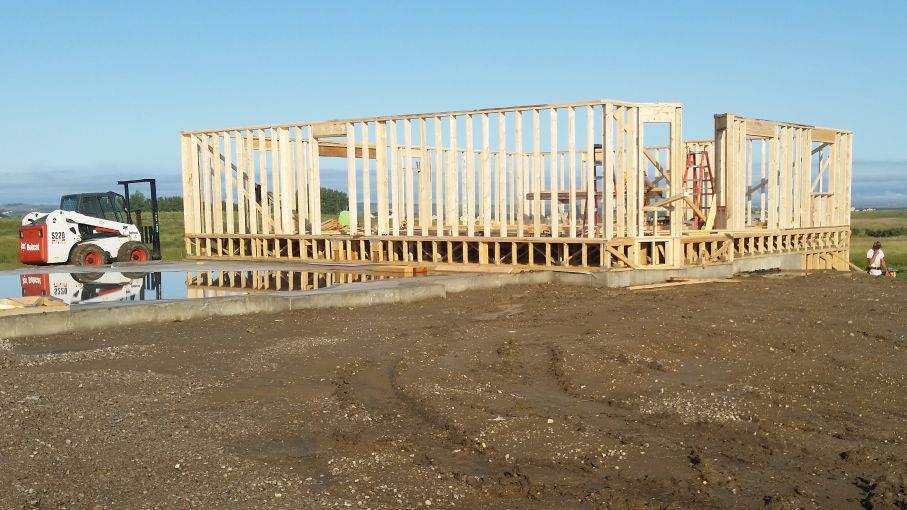
The garage walls are being added. On the ground, in front of the house, are the roof
trusses.
Roof trusses lifted to top of house with a crane.
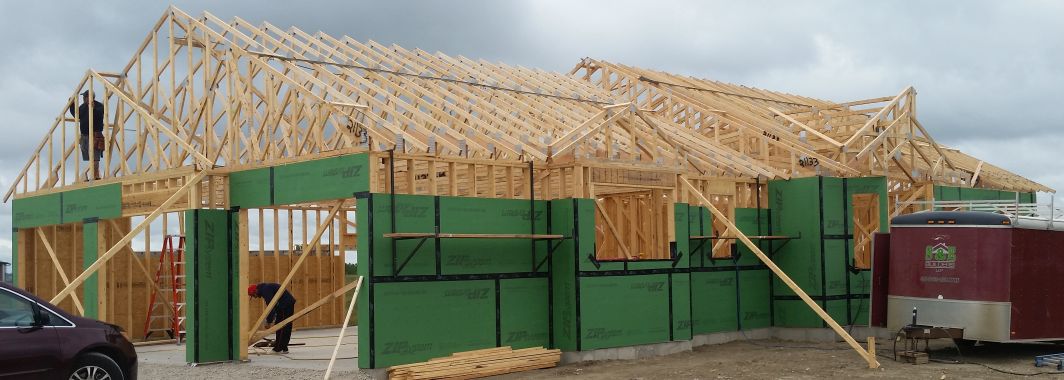
The green wood panels help hold the house together and make the walls stronger.
Those green wood panels are special (Zip). Taped together at the seams (black strips),
they block wind from blowing into the house, yet allow moisture to go through the sheets.
This is important because "wet" insulation does not block the house interior from getting
cold in the winter.
Roof trusses placed with correct spacings.
Note the 2x4's (at an angle) that are holding the 2x4 walls to ensure they are straight
when the roof trusses are attached.
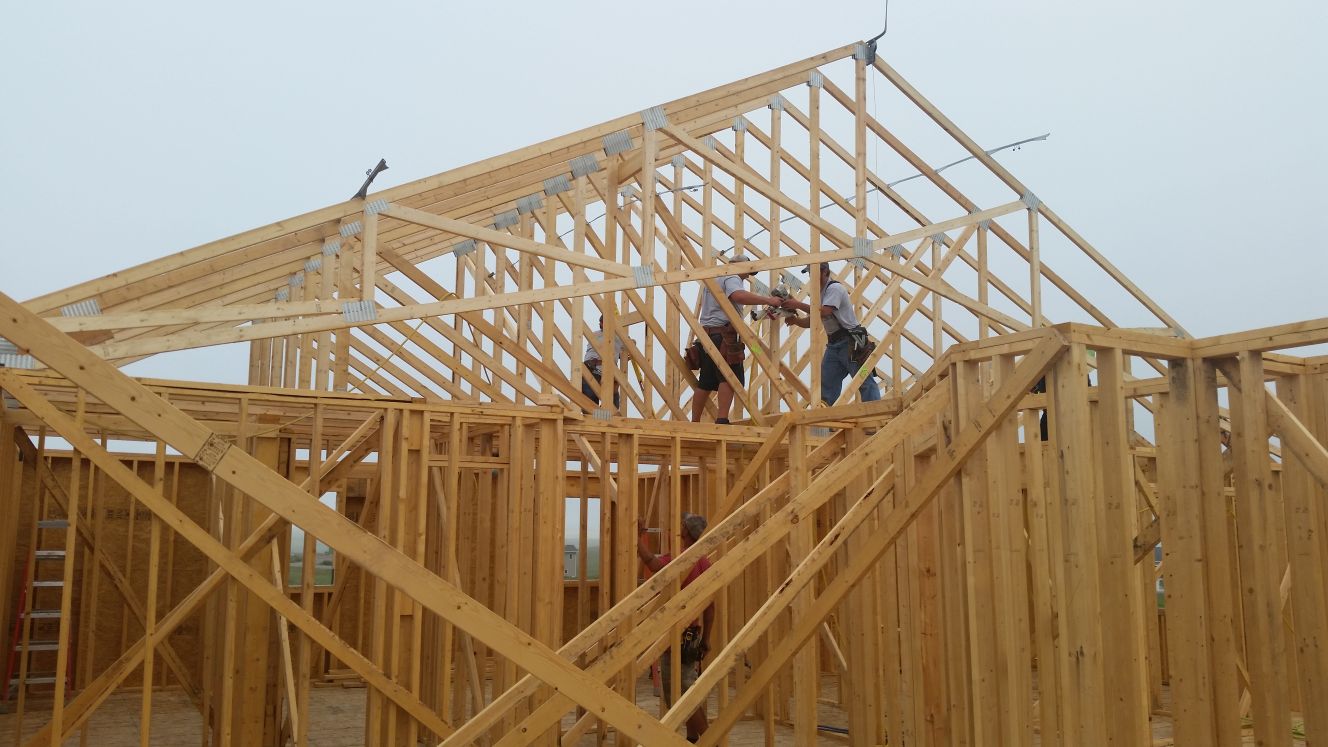
Roof trusses on house and garage. The placement of the roof trusses define the
the angles to the house. Angles make the house look interesting.
Roof sheathing (wood) is placed on top of the roof trusses. Tar paper is fastened to
sheathing before shingles are added. This is to prevent water from leaking into
the house.
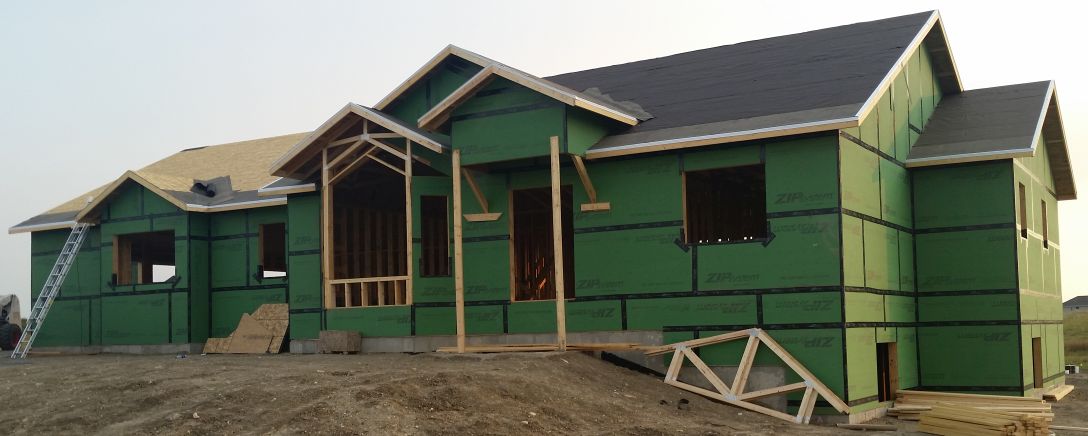
Shingles are placed on top of the tar paper. They start on the bottom of the roof
and work toward the top. This covers the nail holes in the shingles below the new
layer of shingles.
The wall is comprised studs ... 2x4 wood (actual dimensions are 1.5 inches by 3.5 inches).
The walls are typically eight feet in height. This photo is in the garage where the walls
are ten feet in height
The ceiling is comprised of the roof trusses.
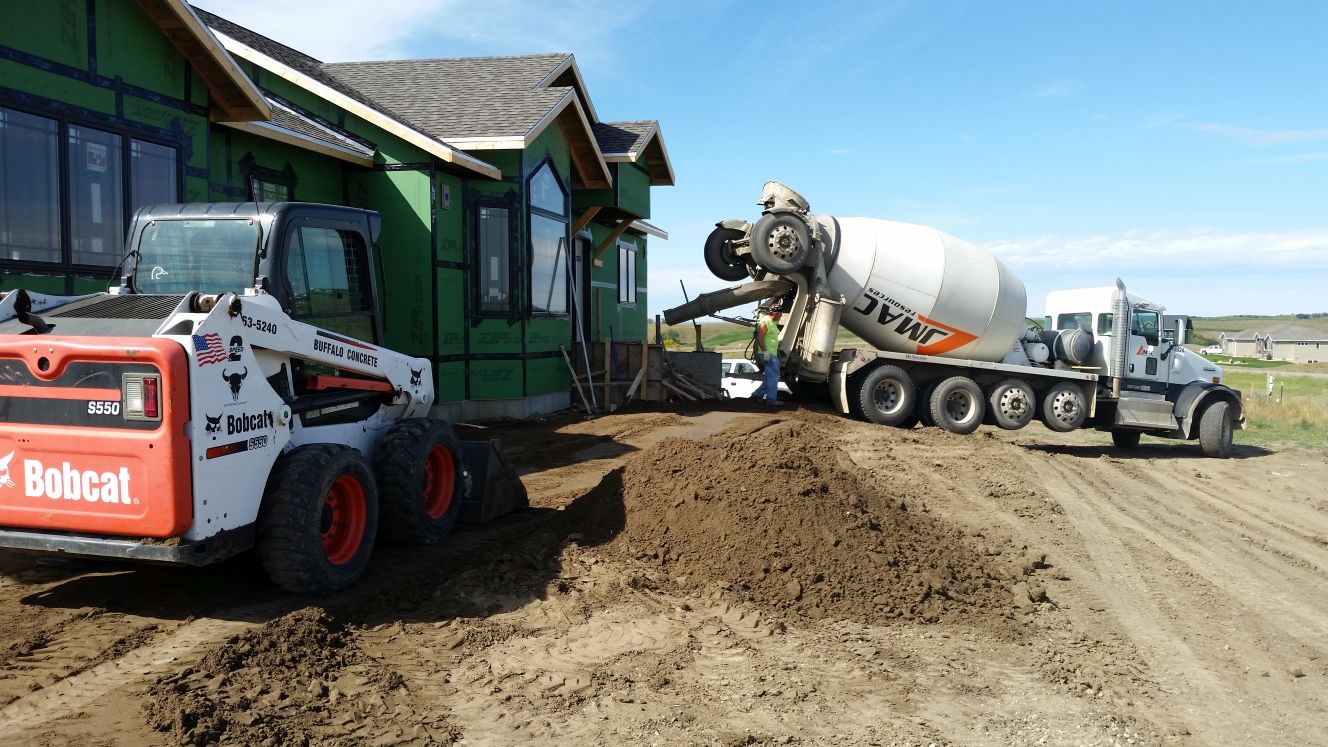
The porch and sidewalk are poured with concrete after the walls of the house are in place.
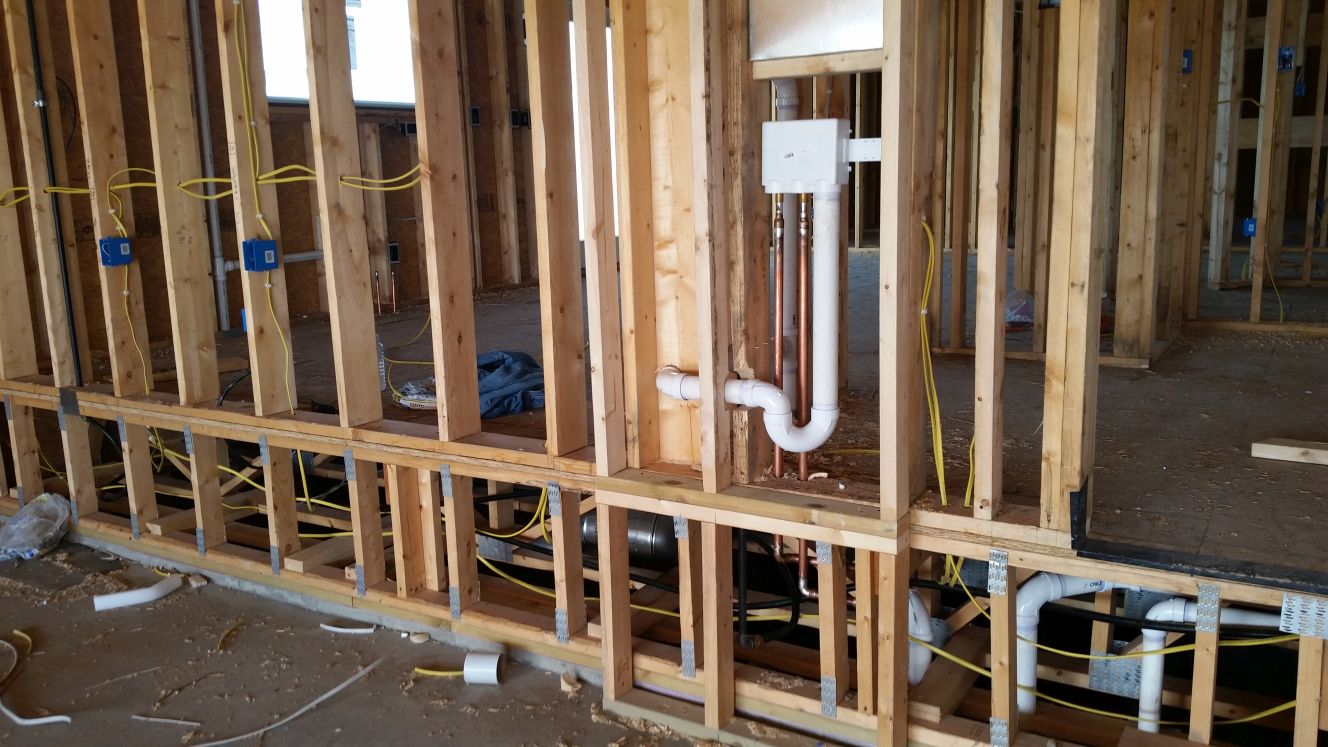
After the walls are installed, the electrical (yellow wire with blue boxes), plumbing (white pipes and copper pipes), and HVAC (heating, ventillation, air conditioning ... the metal pipes, ~six inches in diameter, under the floor).
The electrical distributes electricity around the house via outlets and switches to ceiling lights.
The plumbing distributes water to the faucets, toilets, washing machine, and dish washer.
The HVAC distributes heat (and cool air in the summer) through floor vents in the rooms.
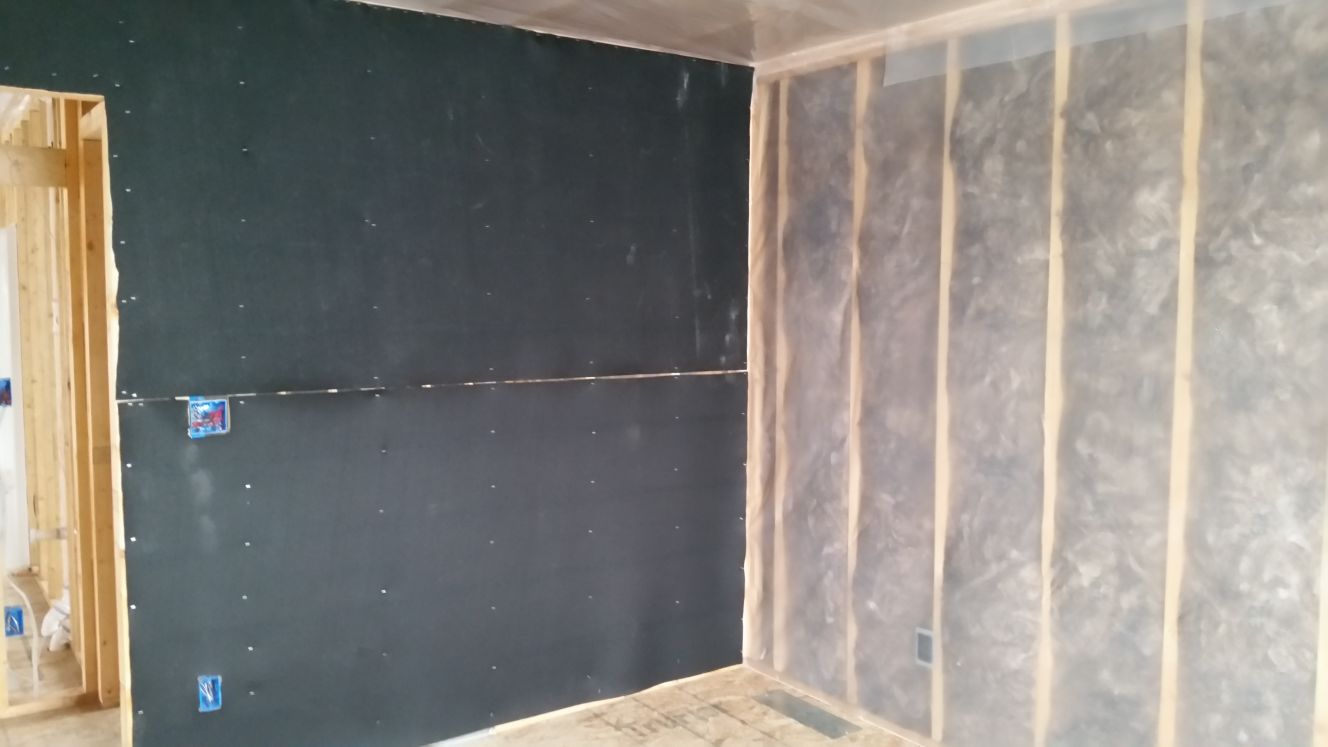
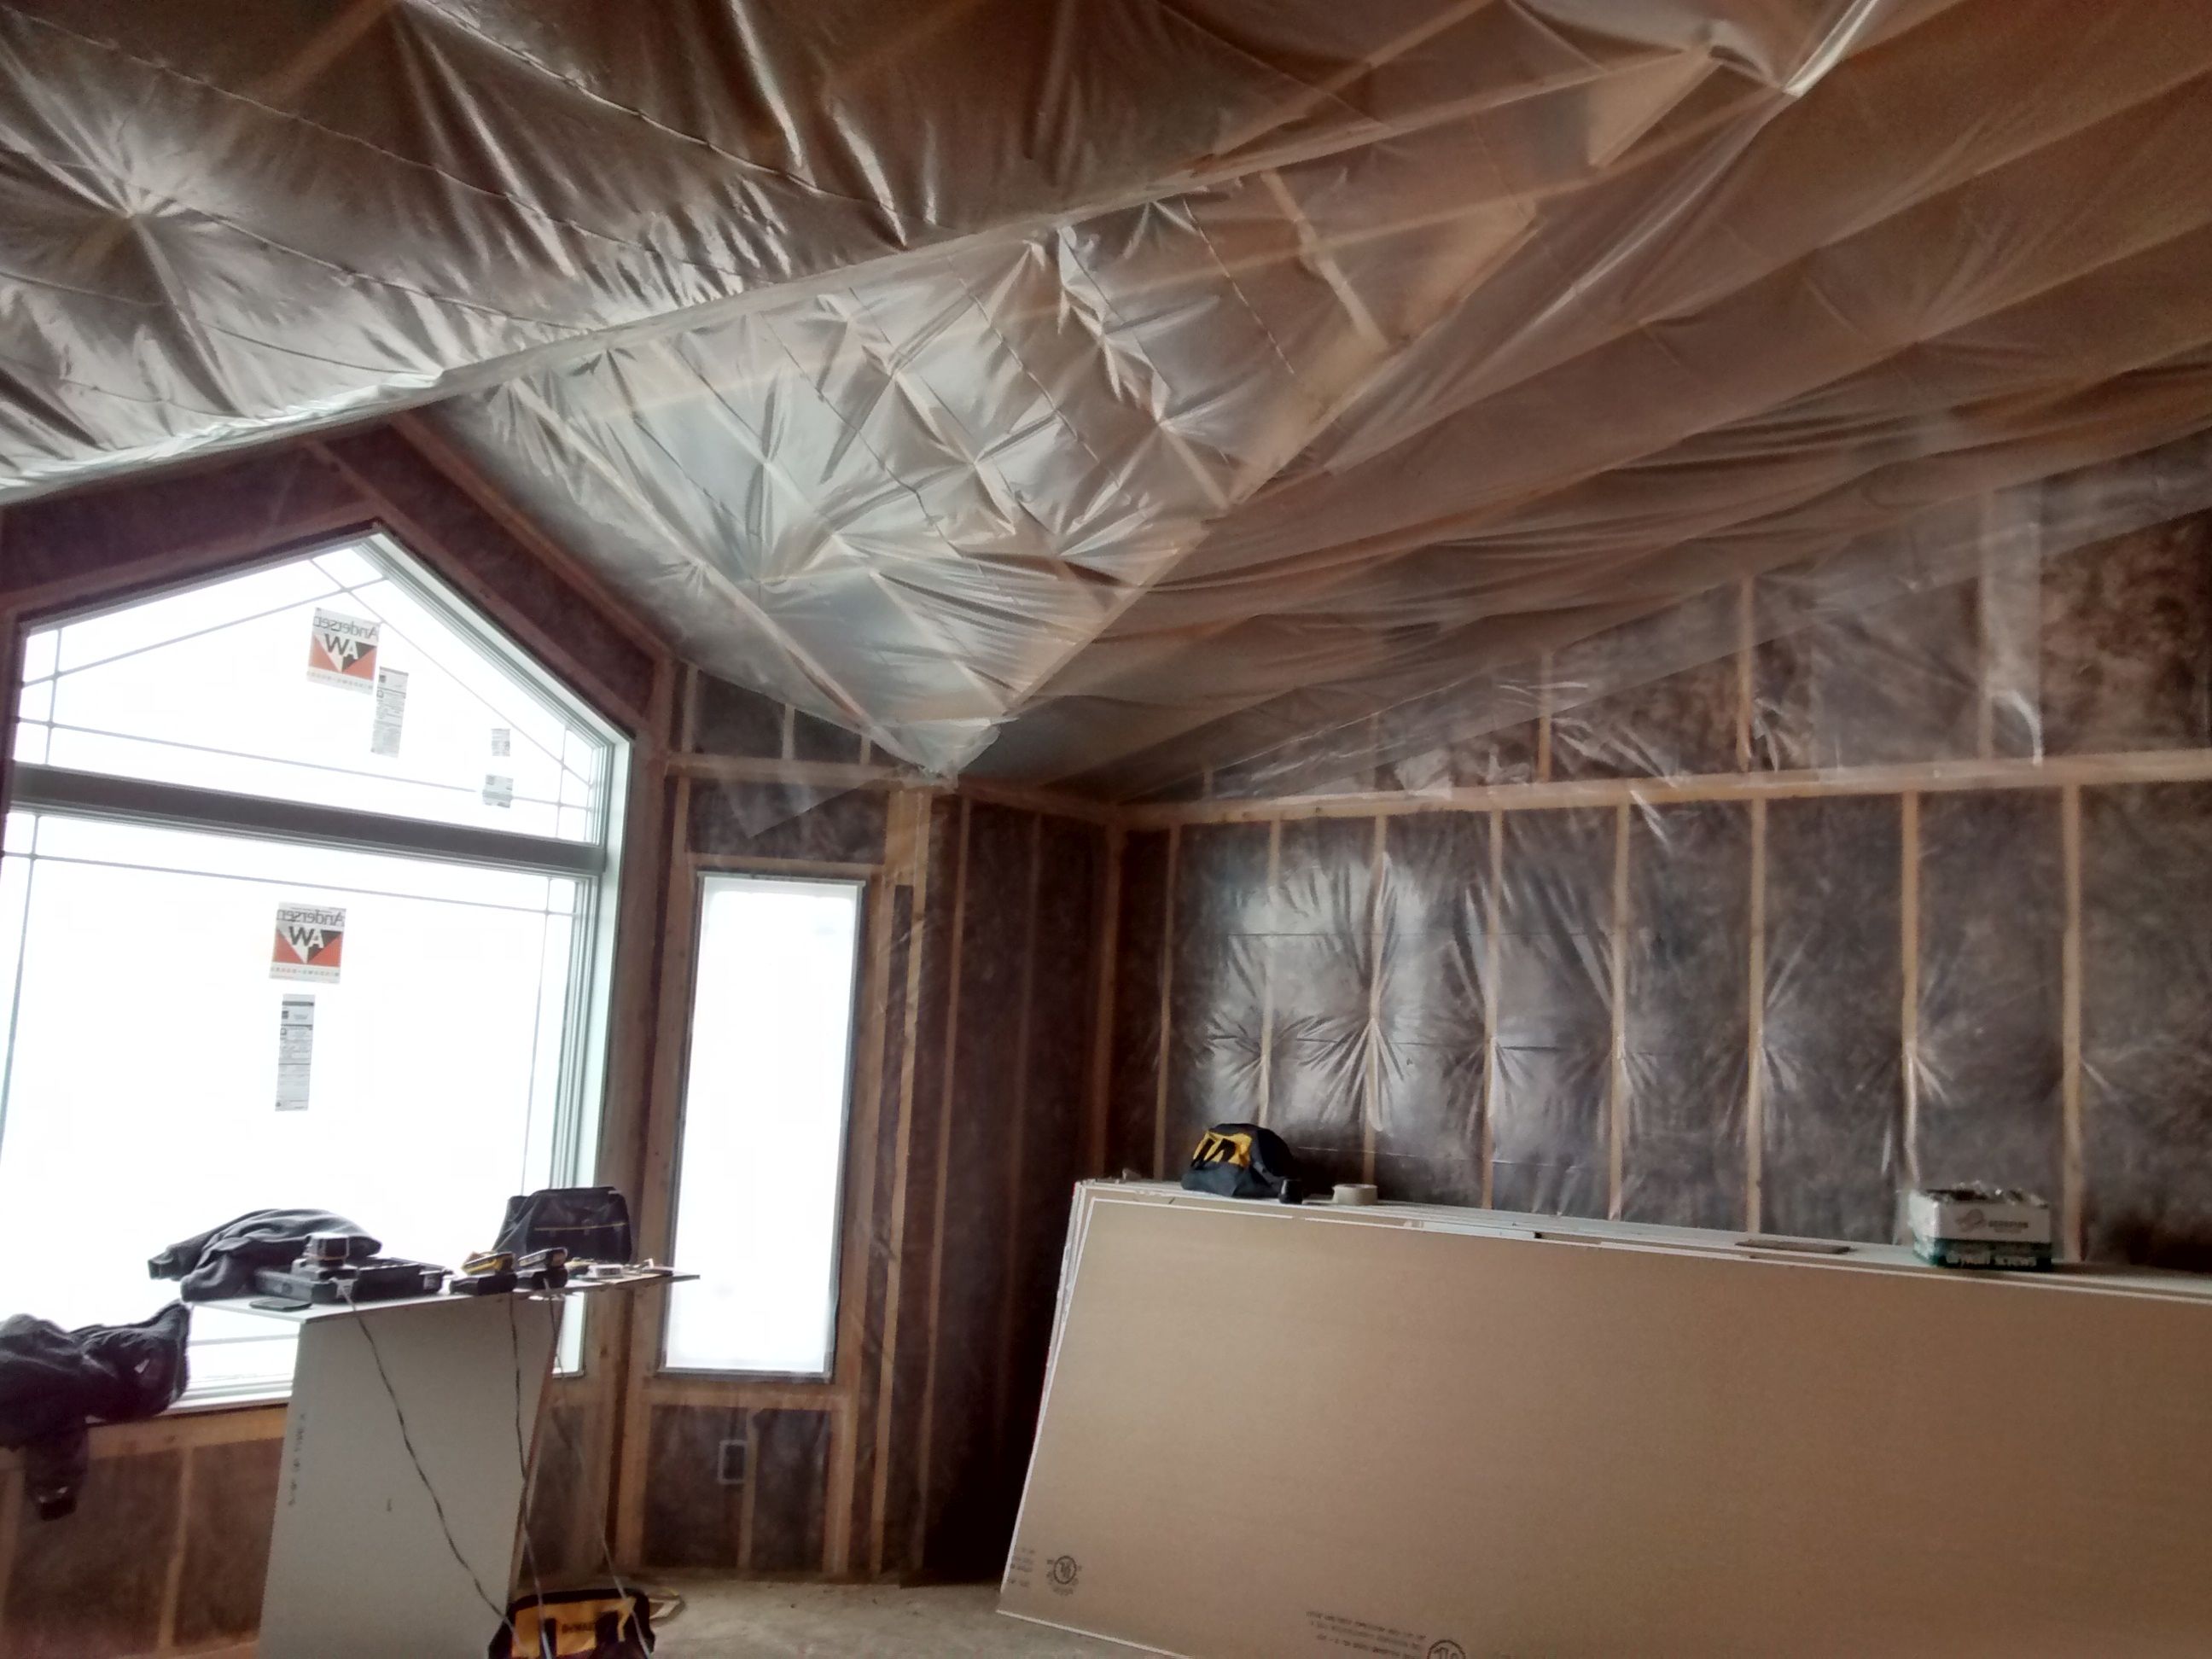
Insulation (brown fiberglass) is inserted between the studs, and in the ceiling, to help
keep the house warm in the winter, and cool in the summer.
Plastic covers the walls and ceiling to keep moisture away from the insulation. Wet insulation
does not insulate very well.
In this room, a black 0.125 inch thick mat provides some sound proofing. This reduces the
potential noise from being heard in the adjacent room.
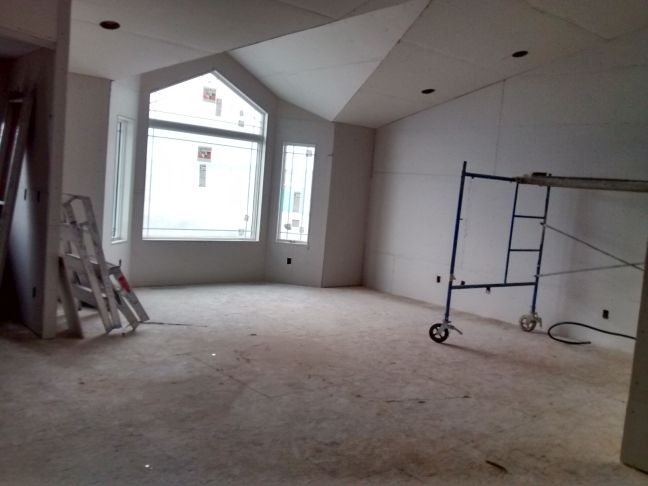
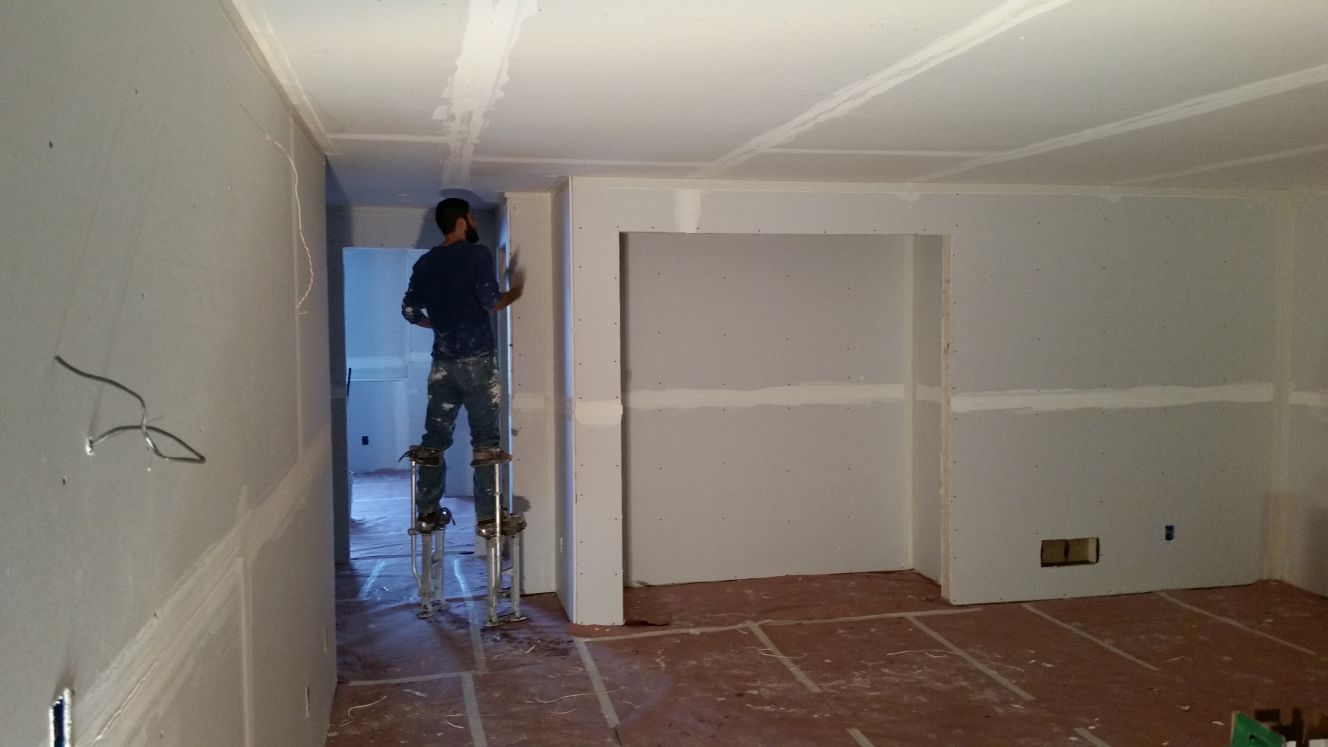
The drywall (also known as sheetrock), 4 foot by 12 foot, is stacked against the walls before being attached to the walls.
The drywall is attached with screws instead of nails. If nails are used, the nails can start
to pop out of the drywall when the outside temperature gets cold, then heats, then gets cold
again and again.
The drywall seams and screw holes are covered with tape and mud (special mud for drywall) to
make the drywall smoother.
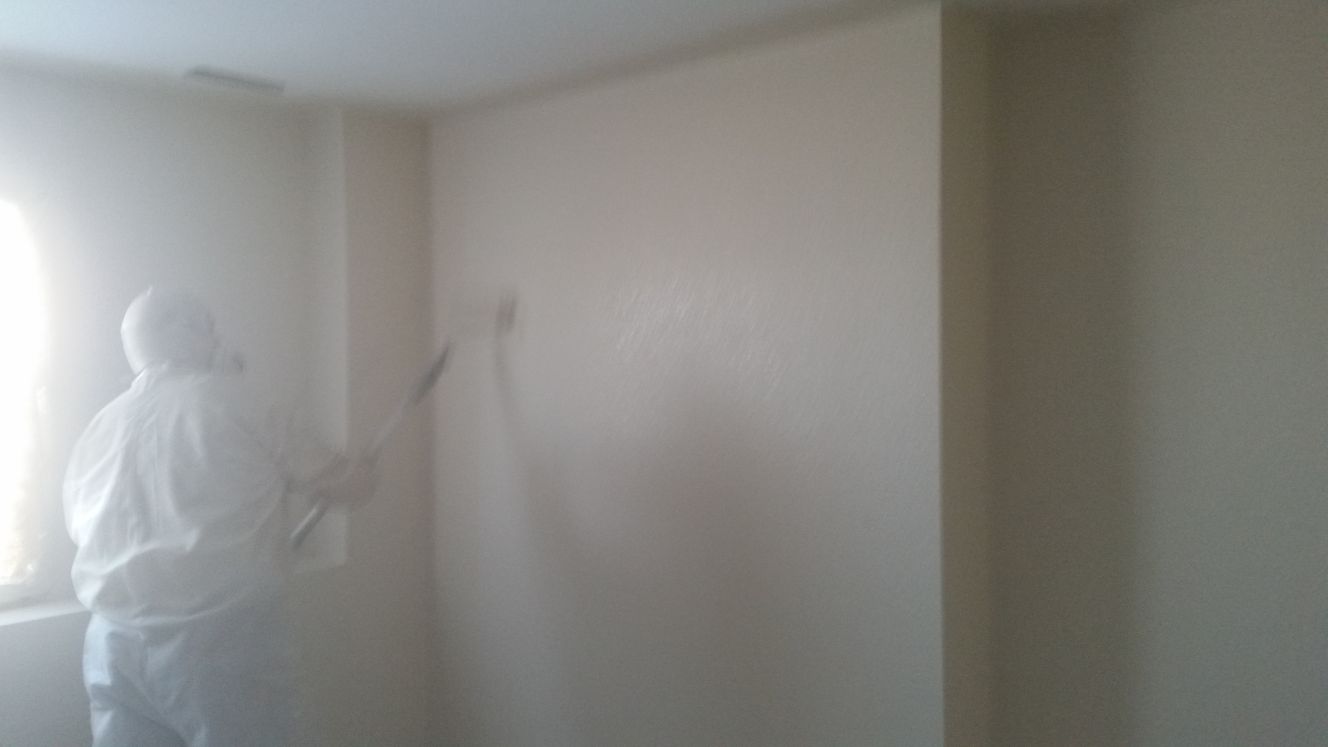
Texture is sprayed on the walls to add interesting patterns to the wall surrace. Then paint
is sprayed on the walls.